 So this normally wouldn’t fall into the “travel” section of the blog, but during the road trip we stopped at Tavis’s folks summer cottage in Eagles Mere, PA.
It all started last year… or maybe two years ago… when we were up at the cottage for a few weeks and had just finished remodeling our master bath at the house we owned at the time. We pulled out the 300+ lbs cast Iron tub, all the wall tile, and framed in a custom shower with pebble floor… it was a lot of work, but really fun and we were doing a good bit of bragging on our newly completed project.
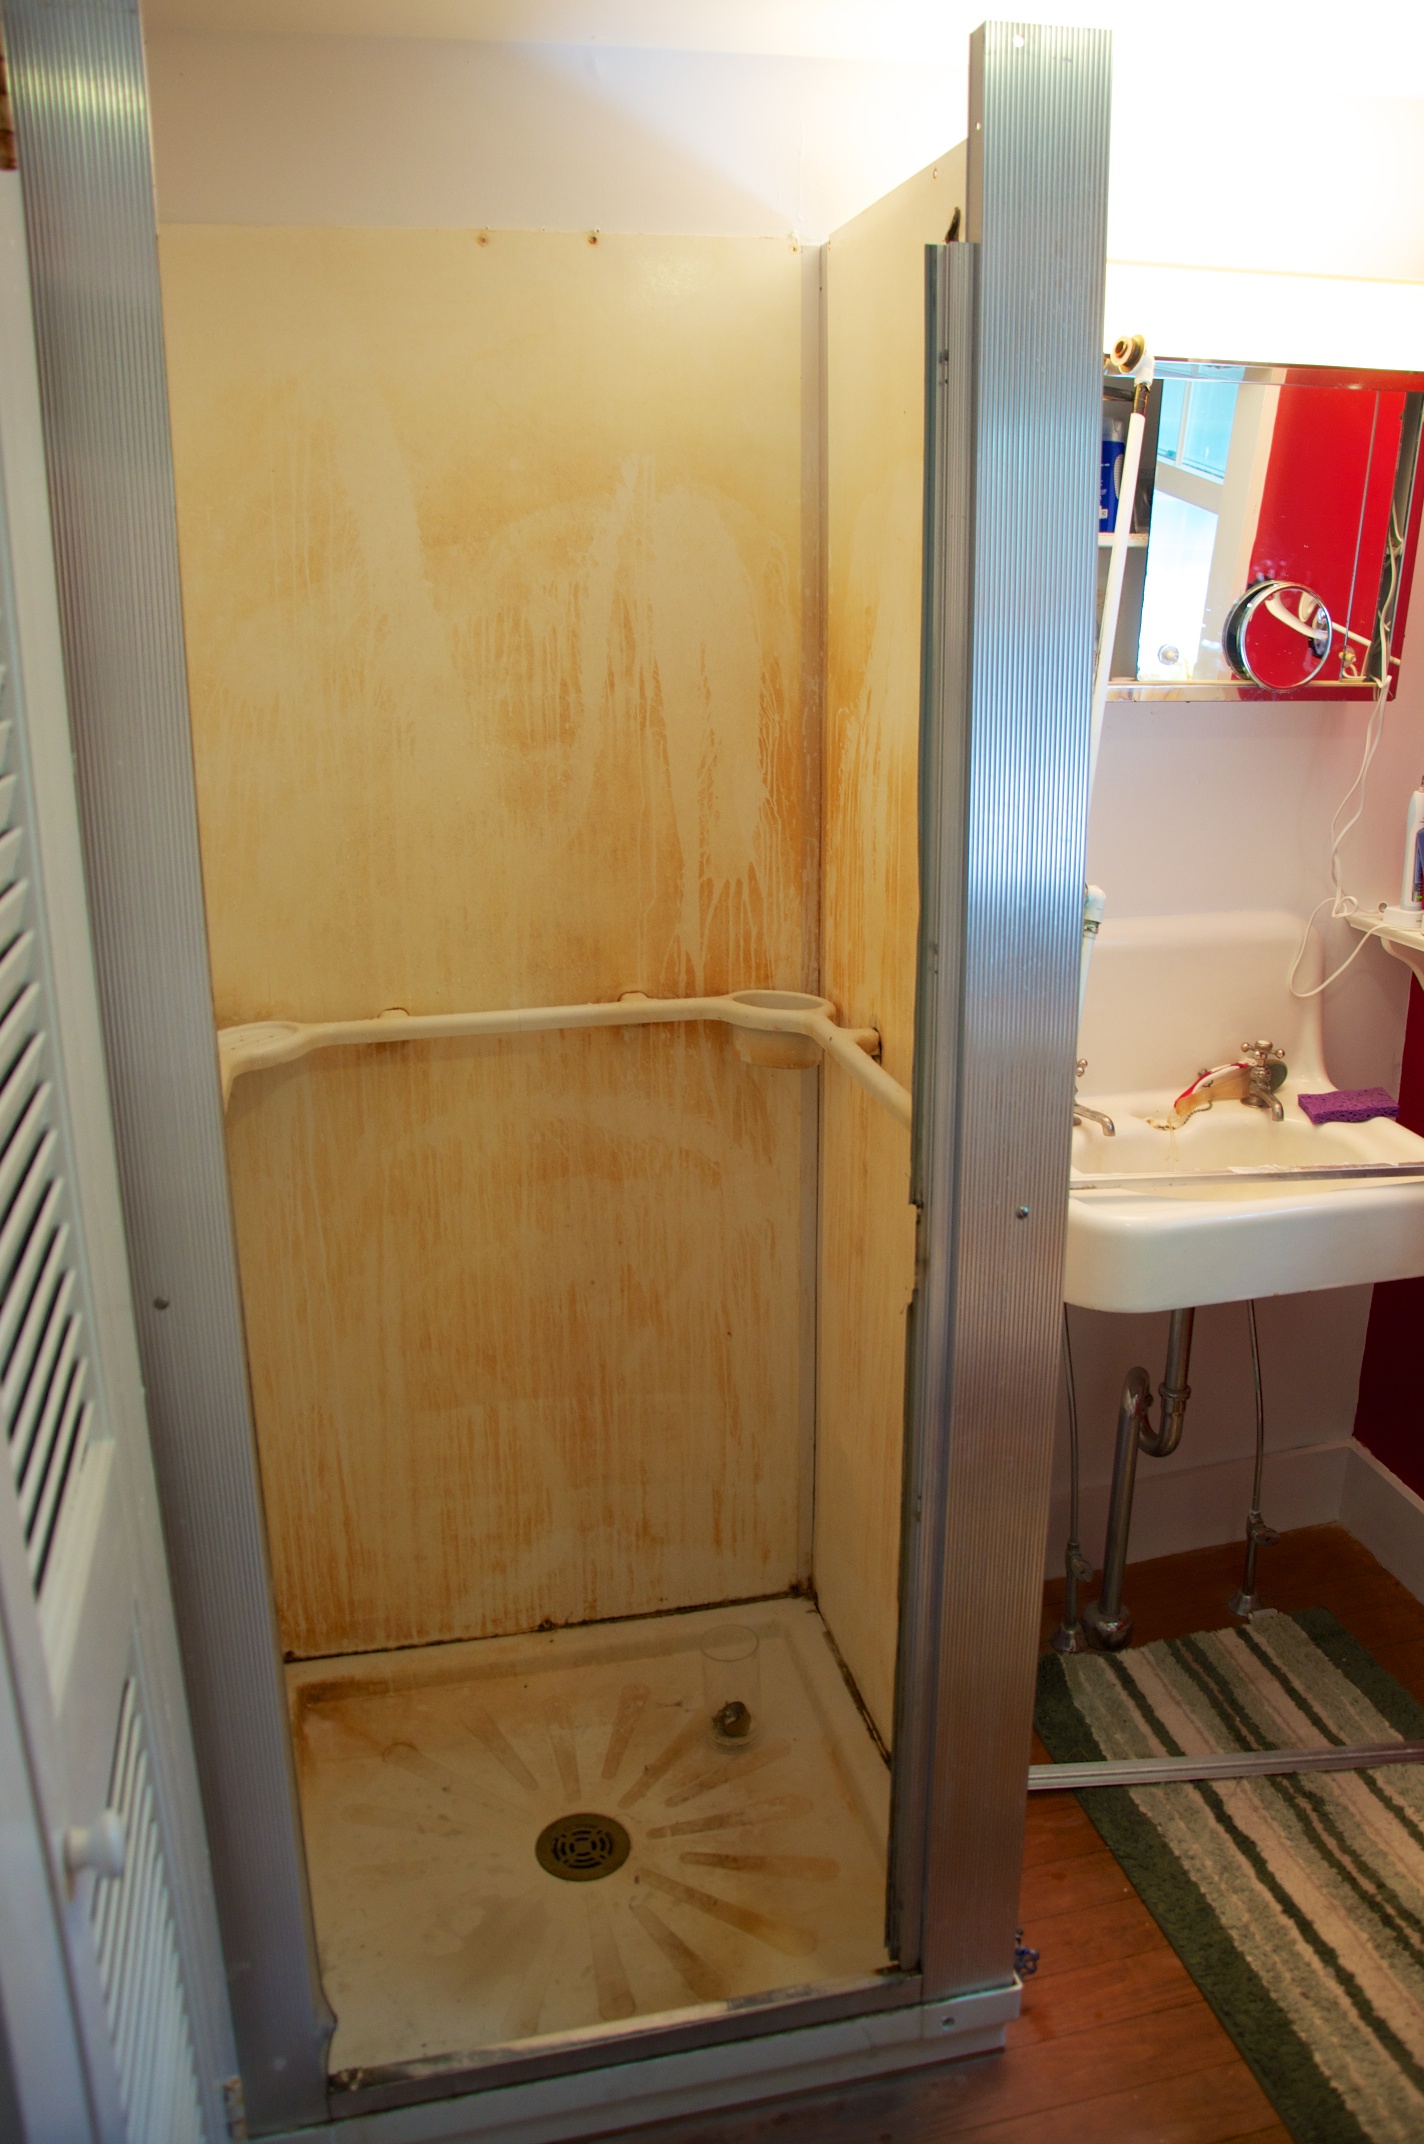
 Fast forward a few months to Tavis and I showing up at the cottage (a few years ago). We took one look at the shower, and its 30+ years of iron stains and broken door…
And immediately told mom and dad how we could build them a new shower and it would be SOOOO Easy!!! (there is a possibility that it was the wine talking but who can really remember)
We didn’t quite convince them to let us build a custom shower, but we did talk them into buying a new prefab shower exactly like the one that was currently installed and we would install it for them the following summer.
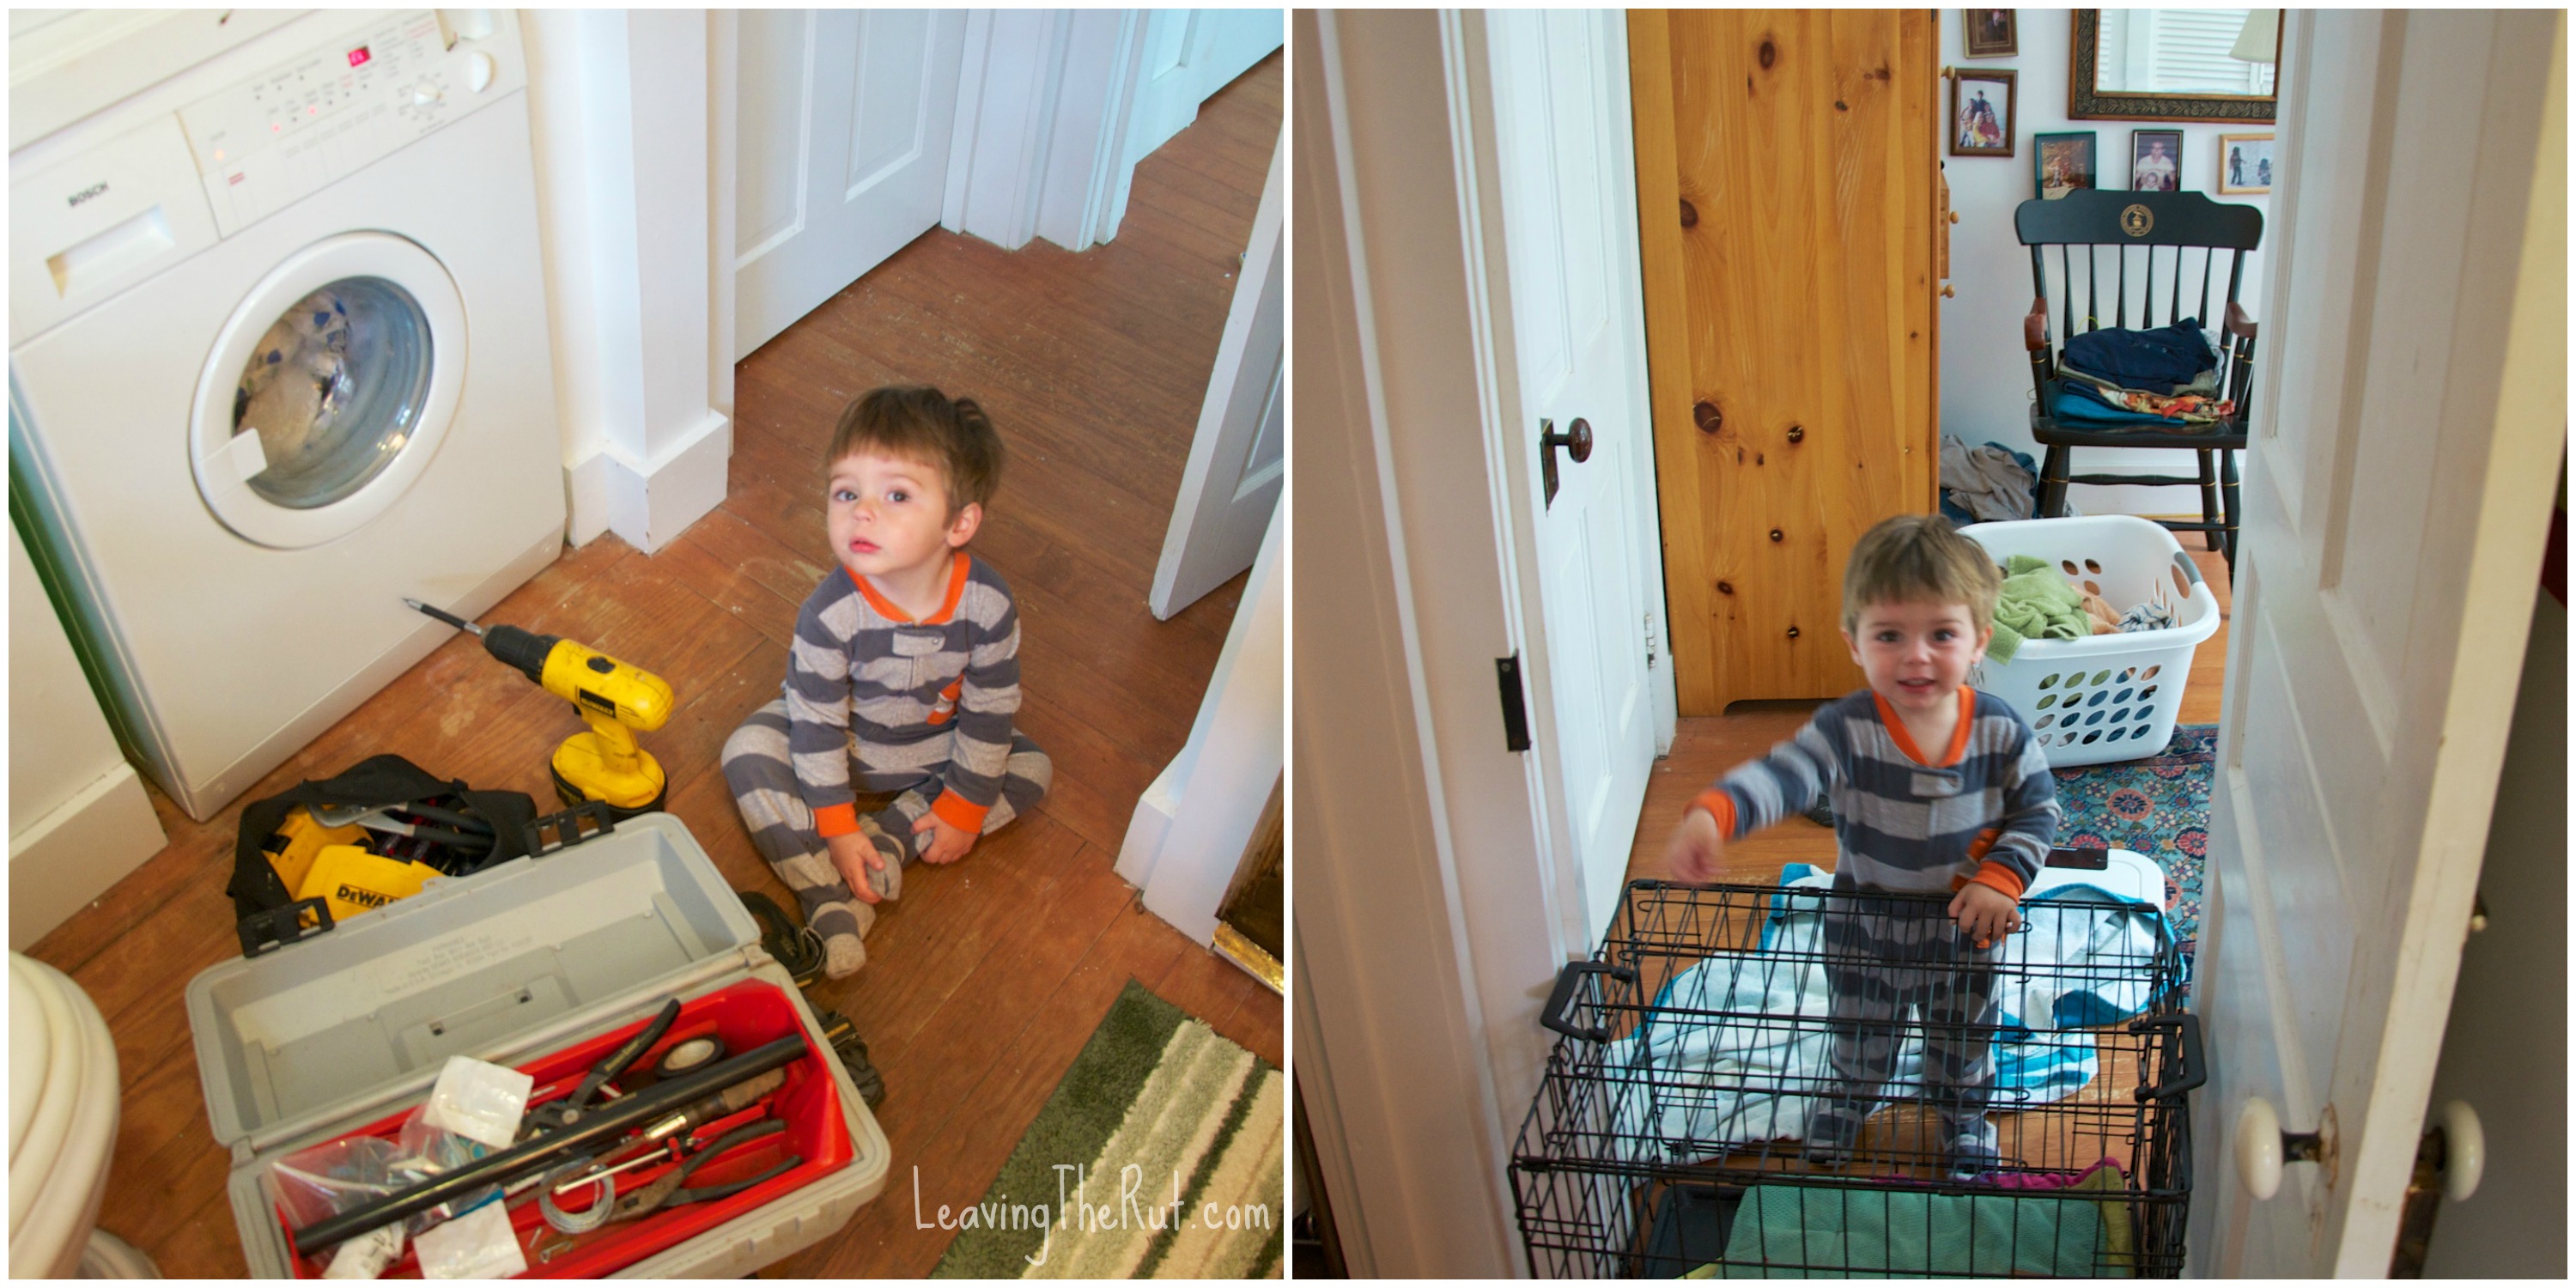
Jump ahead to this summer, we now have a one and a half year old… he loves to get into everything… the small cottage does not lend itself to constructions noises during nap time… motivation really goes out the window quickly when you start sipping on beer at lunch (don’t judge, we were on vacation…) So we are getting down to the end of our time at the cottage and we realize that we had better get to work on replacing the shower!
First item on the list was to properly coral our little helper until nap time so that the tools didn’t keep walking off… and getting thrown over the gate and downstairs… the dog crate wedged in the doorway is probably not the best solution but it did just fine to keep him away from the tools.
 The old shower came out easy enough after we removed a few screws. Tavis carried the parts out through a guest bedroom and on to the sleeping porch (everyone up north needs a sleeping porch, they are the coolest thing ever!!) and tossed it on to the roof for us to retrieve later.
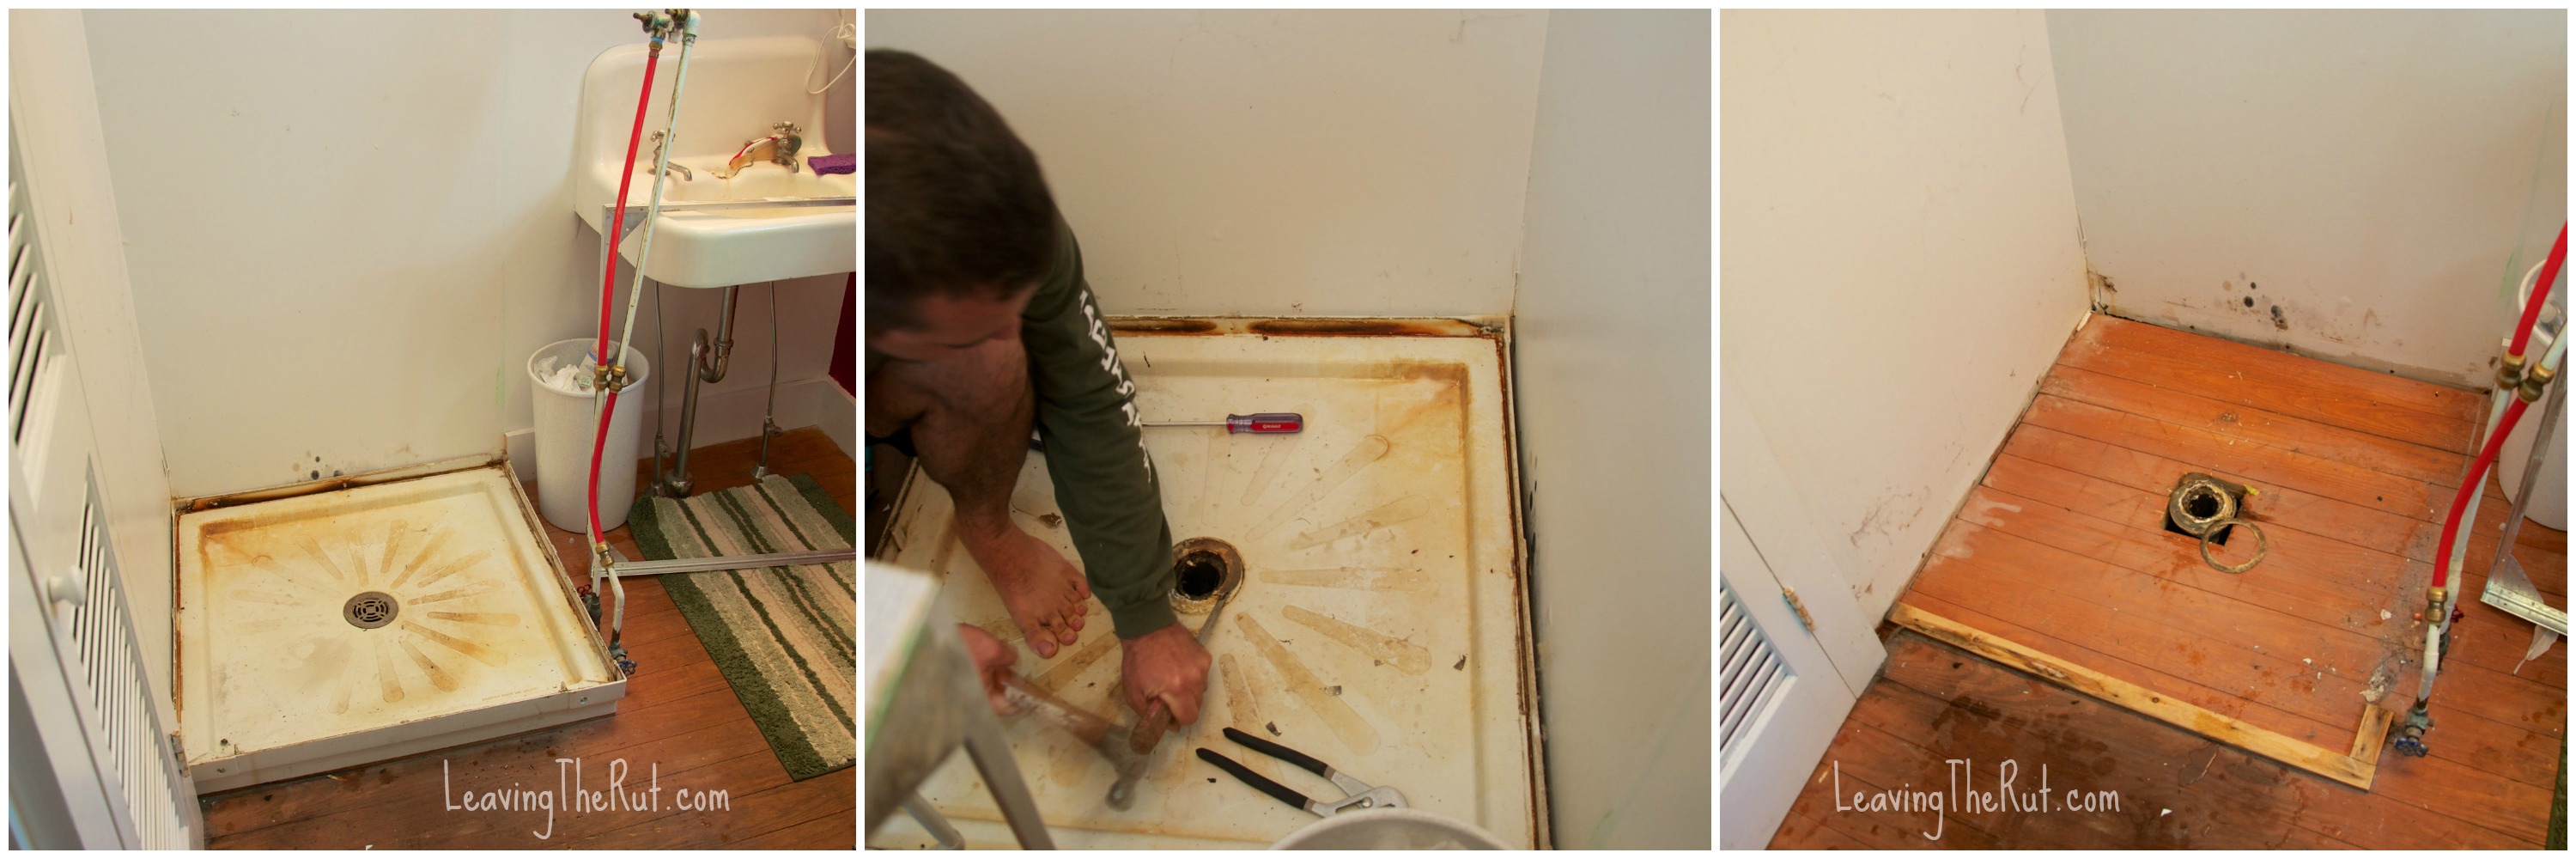
 After the walls were out, we had to get the pan out and that was a little bigger challenge. The 30+ years had cemented parts of the drain together that were supposed to easily come apart. So very carefully, to make sure and not damage the drain pipe, we chiseled the old flange off and were able to get the pan out.
 That was the easy part and we buzzed through that in about an hour or so. Little did we know what awaited us when we started to put the new one together. The new floor pan appeared to drop in place easily enough… appeared to… The drain in the floor pan attached to the drain pipe by sliding a large 2″ rubber gasket in-between the two. The problem is that there was some give in the drain pipe, and we could not get any leverage to press down to force the gasket onto the pipe. Each time we would press, the pipe would give a little and get us nowhere.
After a bunch of fussing, Tavis had the great idea to place something under the pipe so that it would not flex when we pressed it down. That eventually worked, but it took a few hours to get the right size blocks of wood cut and in place. I remember thinking that I wish I had played that Operation game more as a kid, because getting that small piece of wood, under the pipe, at an angle, 1 foot beneath the floor, through a small hole, filled by a pipe flange may have been a bit easier!!
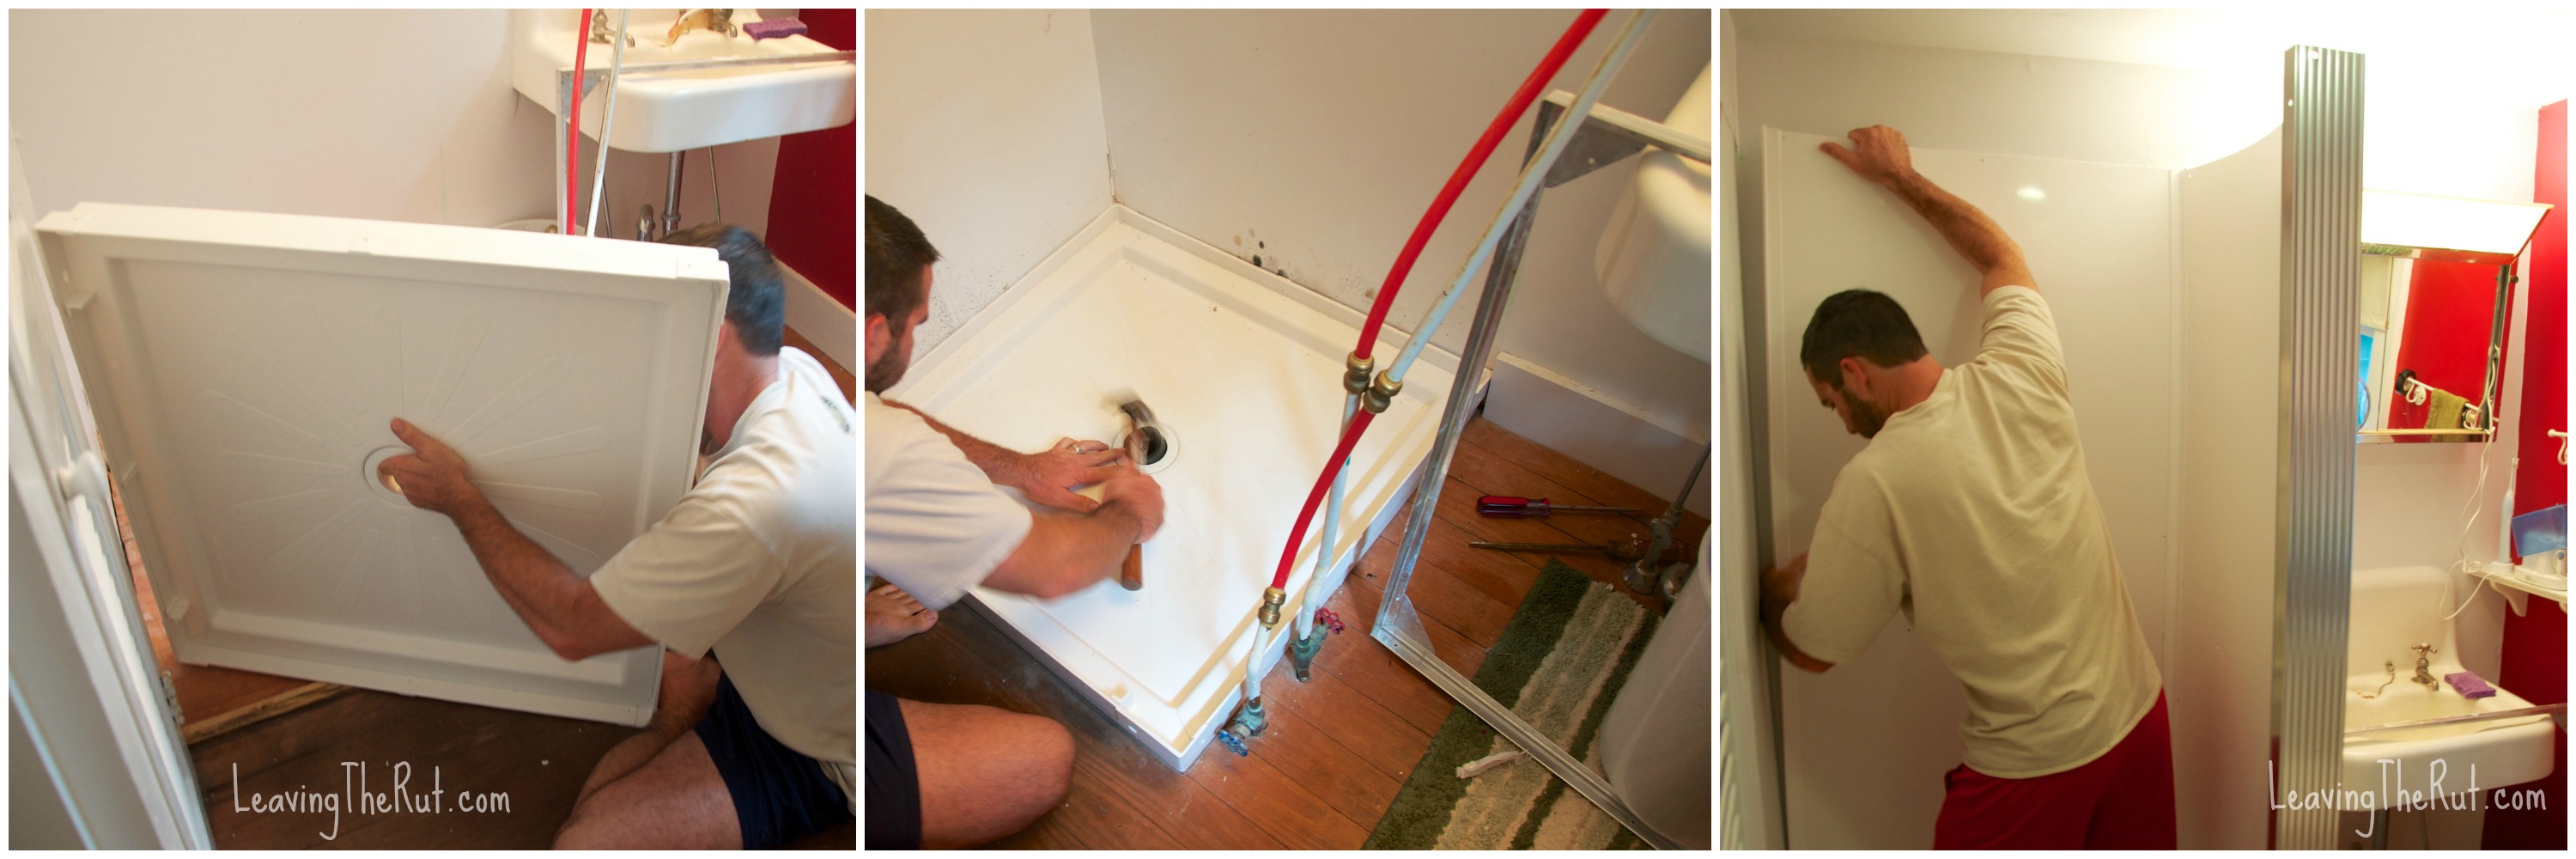 After we got the pipe up on blocks… we still were using a hammer, vaseline and a lot of brute force to get the gasket in just the right place. It was starting to get dark out so we called it quits for the night and decided to retire to the front porch and sip on something… Tavis kinda had a glazed over look on his face by this point so I thought it was for the best.

The next morning we jumped right back into the middle of it. I am going to apologize now, I really failed with pictures during this part. I must have been so frustrated that I just spaced out. This little shower was getting the best of us…
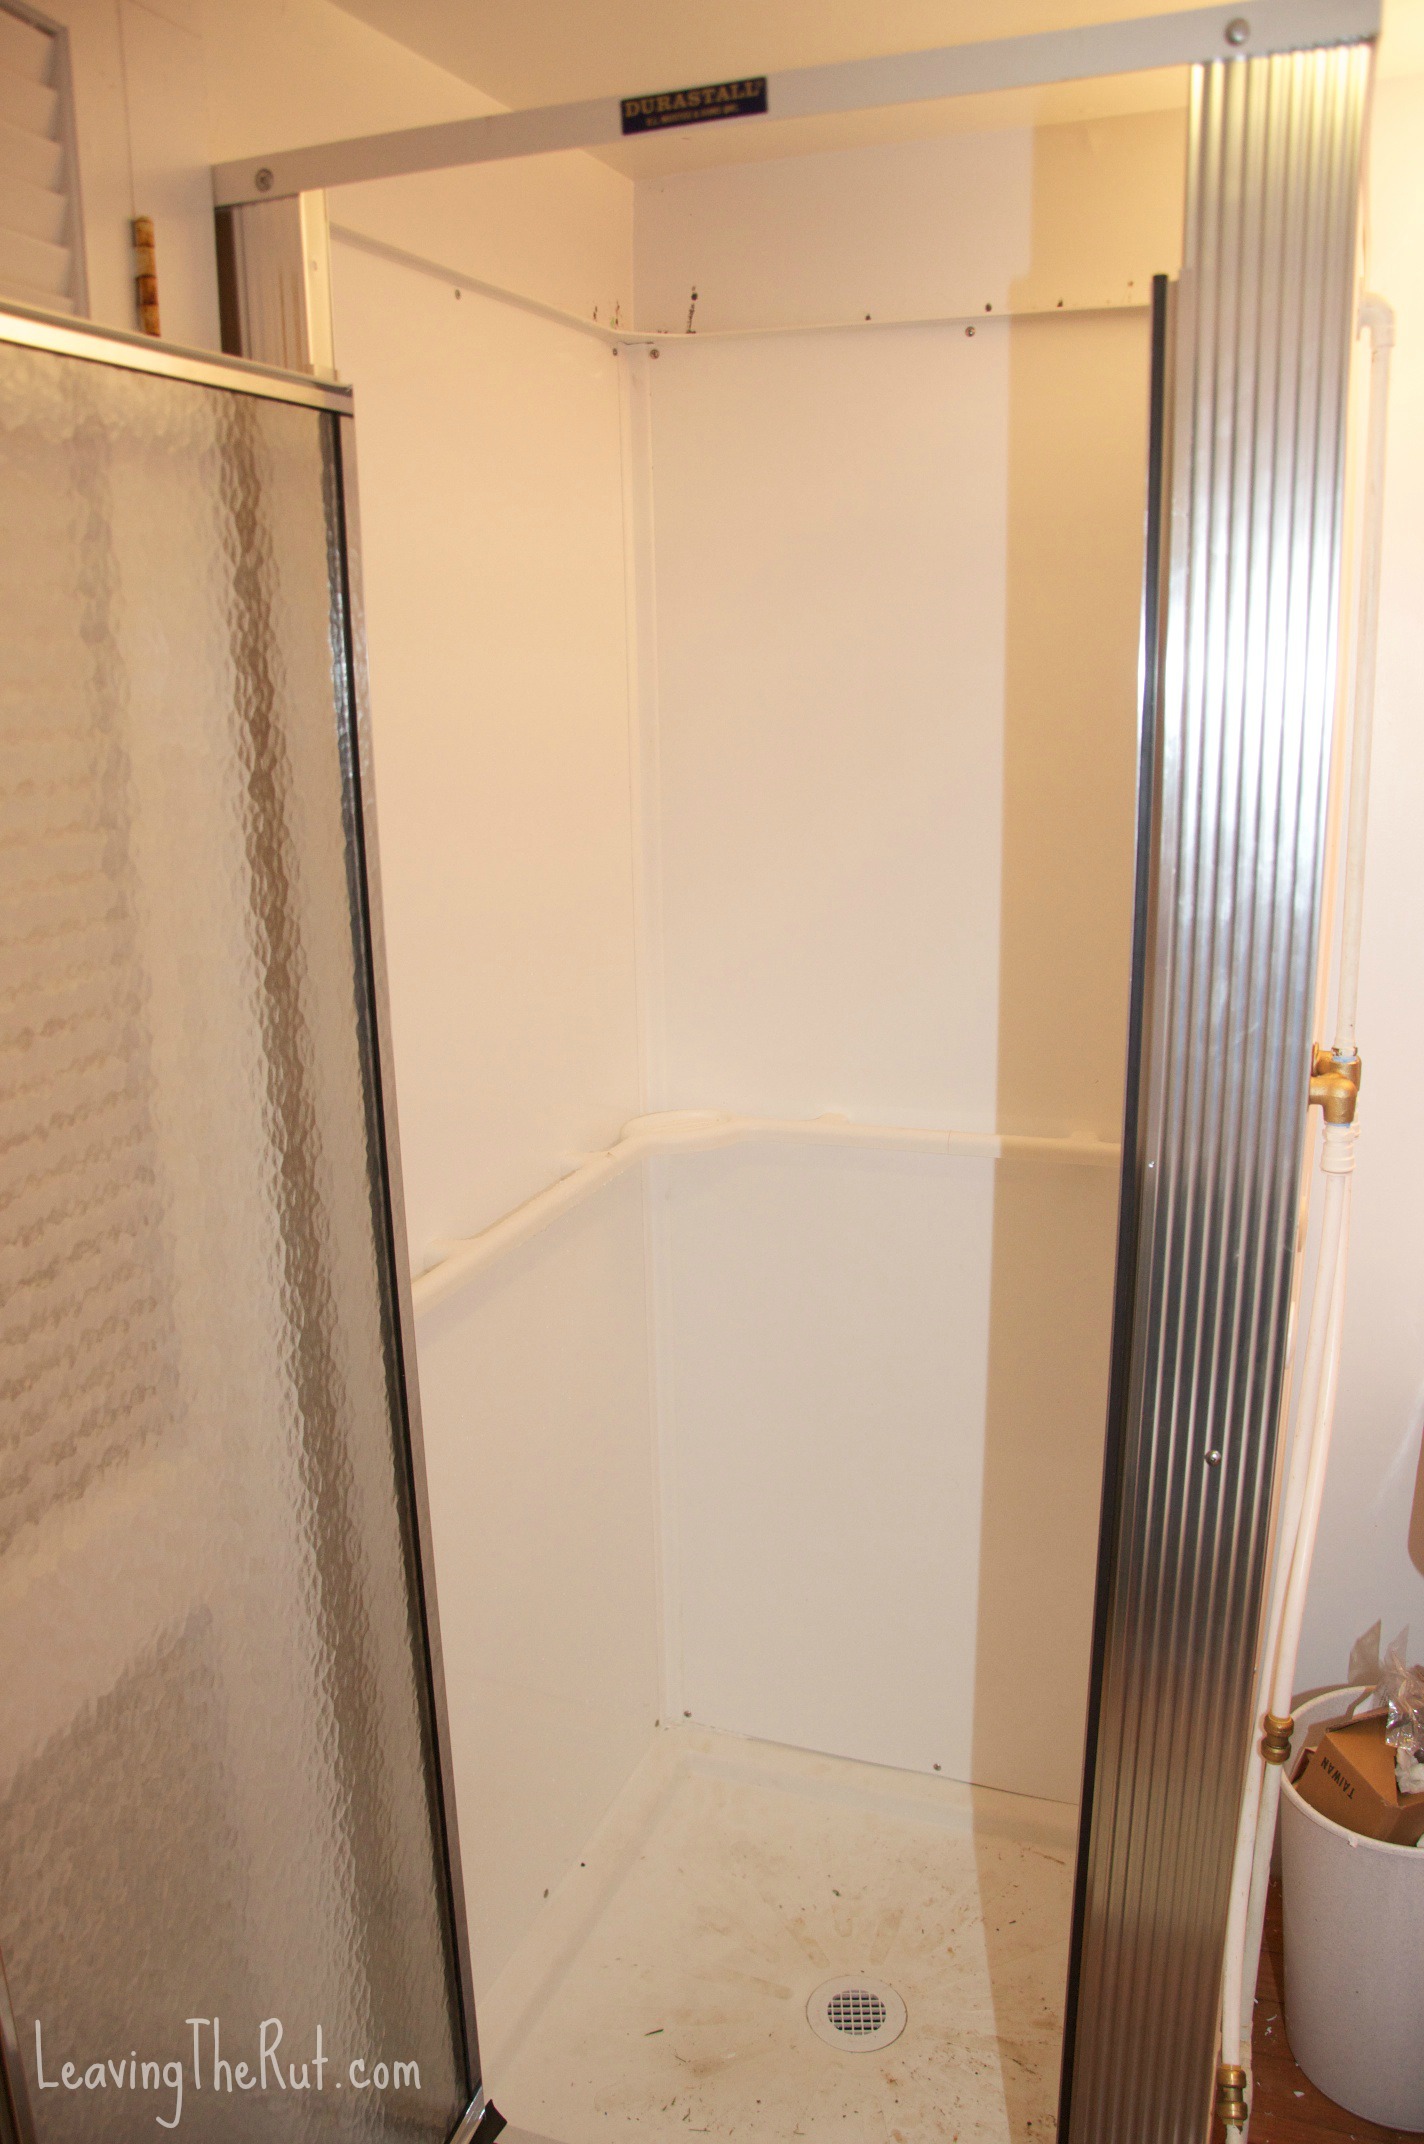
The shower comes from the store in a box that is the size of one of the wall panels, but only about 6 inches deep, so you have to connect all the walls together by sliding the flimsy plastic panel into a chanel in the corner of an “L” bracket. Each one took us about 45 minutes to an hour to get completely installed. Then after that, you have to make sure that they are plum and level, so that when you set it on the plastic floor pan, it sits level and all the shower wall panels drop down into the floor channel and lock in place.
This took us all morning and part of the way into the afternoon. We ended up pressing each of the walls down into the floor channel as far as we could and put the screws into the wall to keep them in place. There were some gaps in the bottom and we used water proof calk to fill those in and keep the water where it should be. The directions call for calk, but probably not as much as I used…
In the end, I don’t think that I would recommend this shower to anyone to install yourself. But, If you have put several of these together, and you know some secret tricks to get all the parts to magically fit together, you can probably make millions, just sayin’…
So this quick and easy project ended up giving us 2 full days of fun and believe me when I say that I won’t be bragging on my “mad remodeling skills” anytime again soon…
It was great to have it completed before we left town and know that the new shower awaits us next year. Hopefully it is still standing!!! 😉


I am enjoying following your adventure! I originally found your blog because I am considering buying an airstream with my spouse for full time living even though we currently own a home, and we are planning to have children so I am intrigued with how to make that all work. Blogs like yours show me this is totally feasible, and I also really enjoy reading about the parenting aspect of your travels. xoxo
Kari,
Glad to hear that you are enjoying all of our craziness!! We have lived full time in our airstream several times and really love it!! One of those time periods is when my husband Tavis was training for his current job and we had to move to new training locations for schools every 6-12 weeks. It was fun but crazy at the same time. living full time in an airstream is easier than you think, it is really freeing to whittle your stuff down to just the essentials. We have a “bunkhouse” model which is great for when you have kids. Although all the airstreams have dinettes and couches that make into beds, it is nice to not have to convert a dinette back each morning. The bunkhouses are the only Airstreams that have 2 full time dedicated sleeping areas.
If you haven’t found it yet, check out http://www.airforums.com it is a wealth of knowledge and lots of helpful people who love to share their experience with you. 😉
Let me know if you have any questions and good luck in your search for the Airstream that is right for you guys!!
Ashley
Thanks! Yes and they started making bunkhouses again in 2013! Although a bit pricey :/ it is very exciting to plan these life changes, and it is our version of joining the tiny house movement and downsizing/only keeping what we really need. We’re moving from San Antonio to Portland and I think we will fit right in. Thank you for all of your insight. Happy travels!