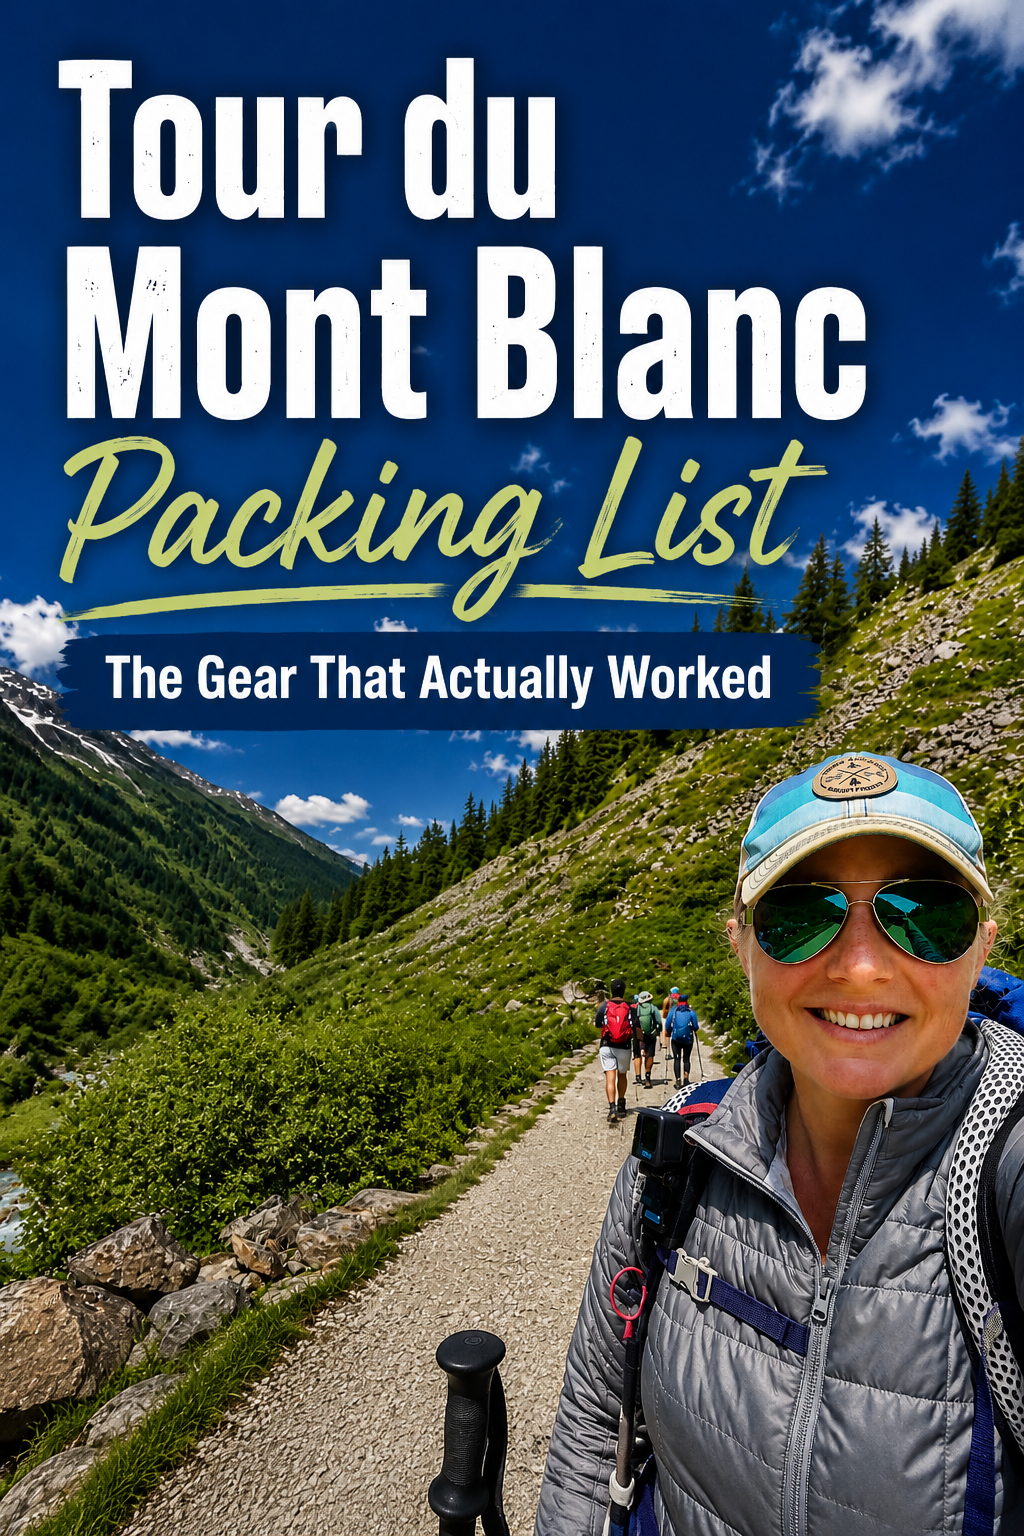
Before hiking the Tour du Mont Blanc, I spent months reading gear lists, watching YouTube videos, and trying to figure out what I actually needed to carry for nearly two weeks in the Alps.
Now that I’ve completed the hike, I can honestly say some items earned their place in my backpack every single day while others could have stayed home.
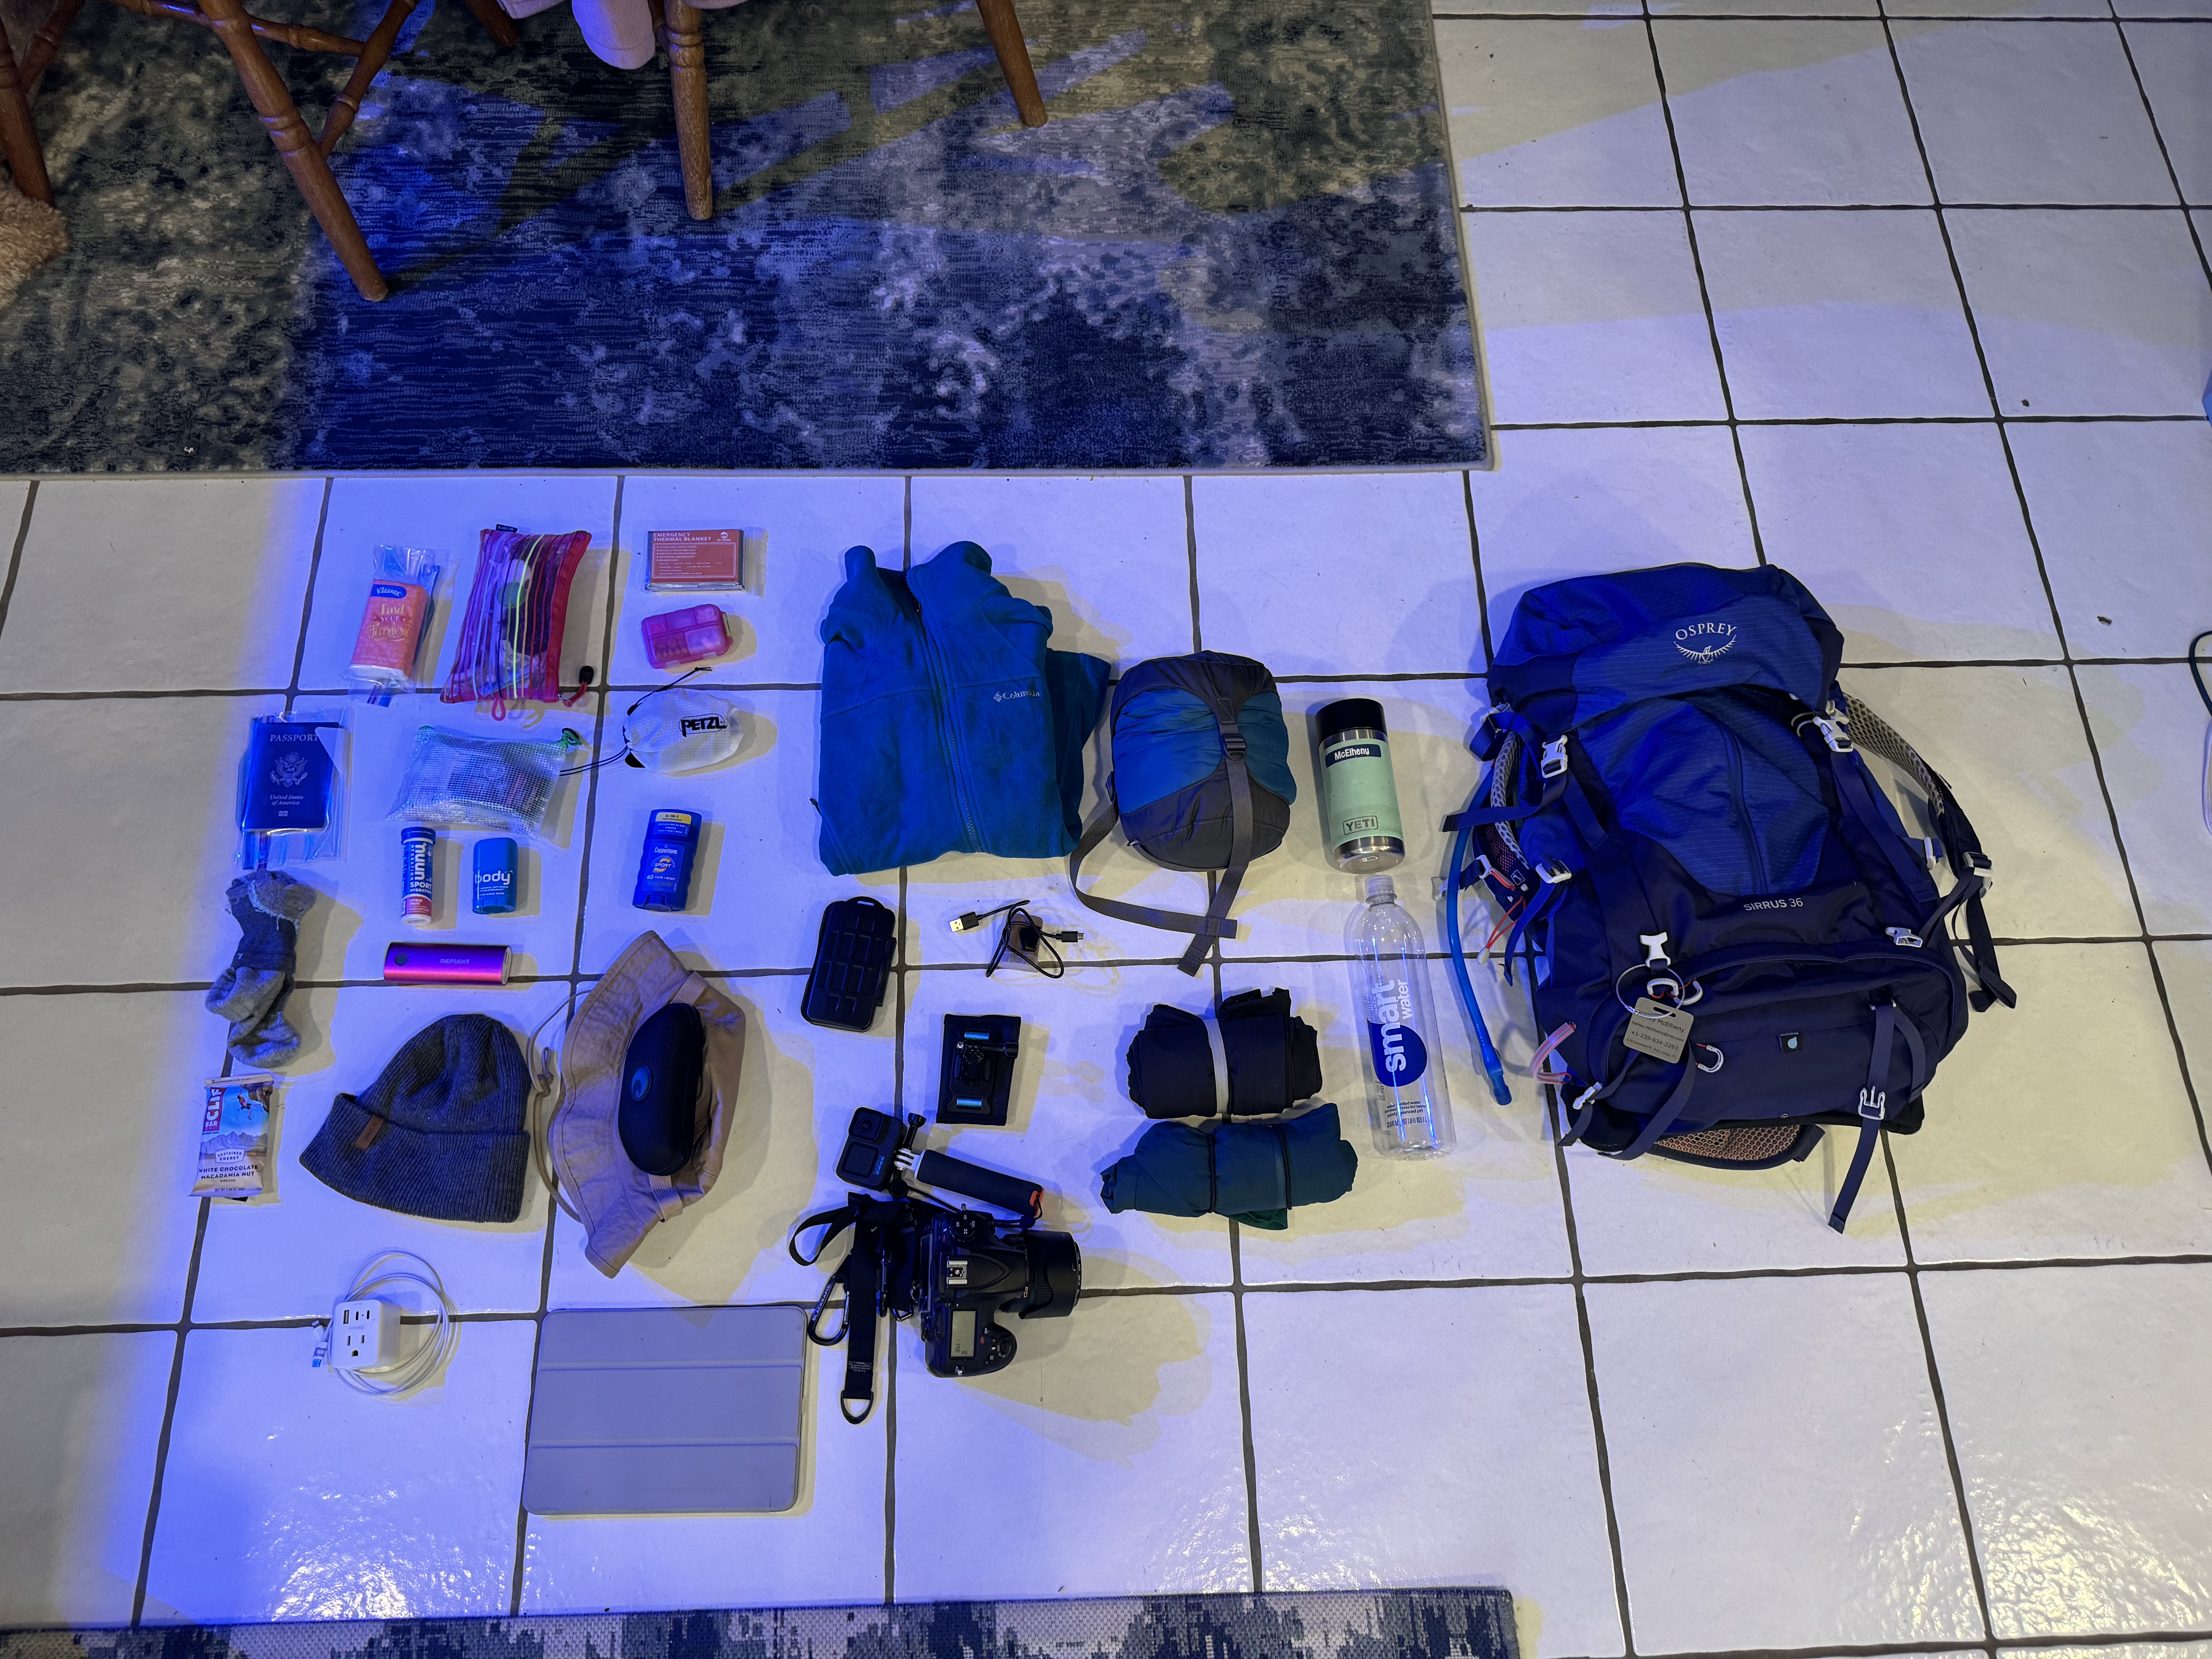
This isn’t a theoretical packing list. It’s the gear I actually used while hiking through France, Italy, and Switzerland, including what worked, what didn’t, and what I’d do differently next time. I am hoping to hike TMB again in a few years with Tavis and Aiden.
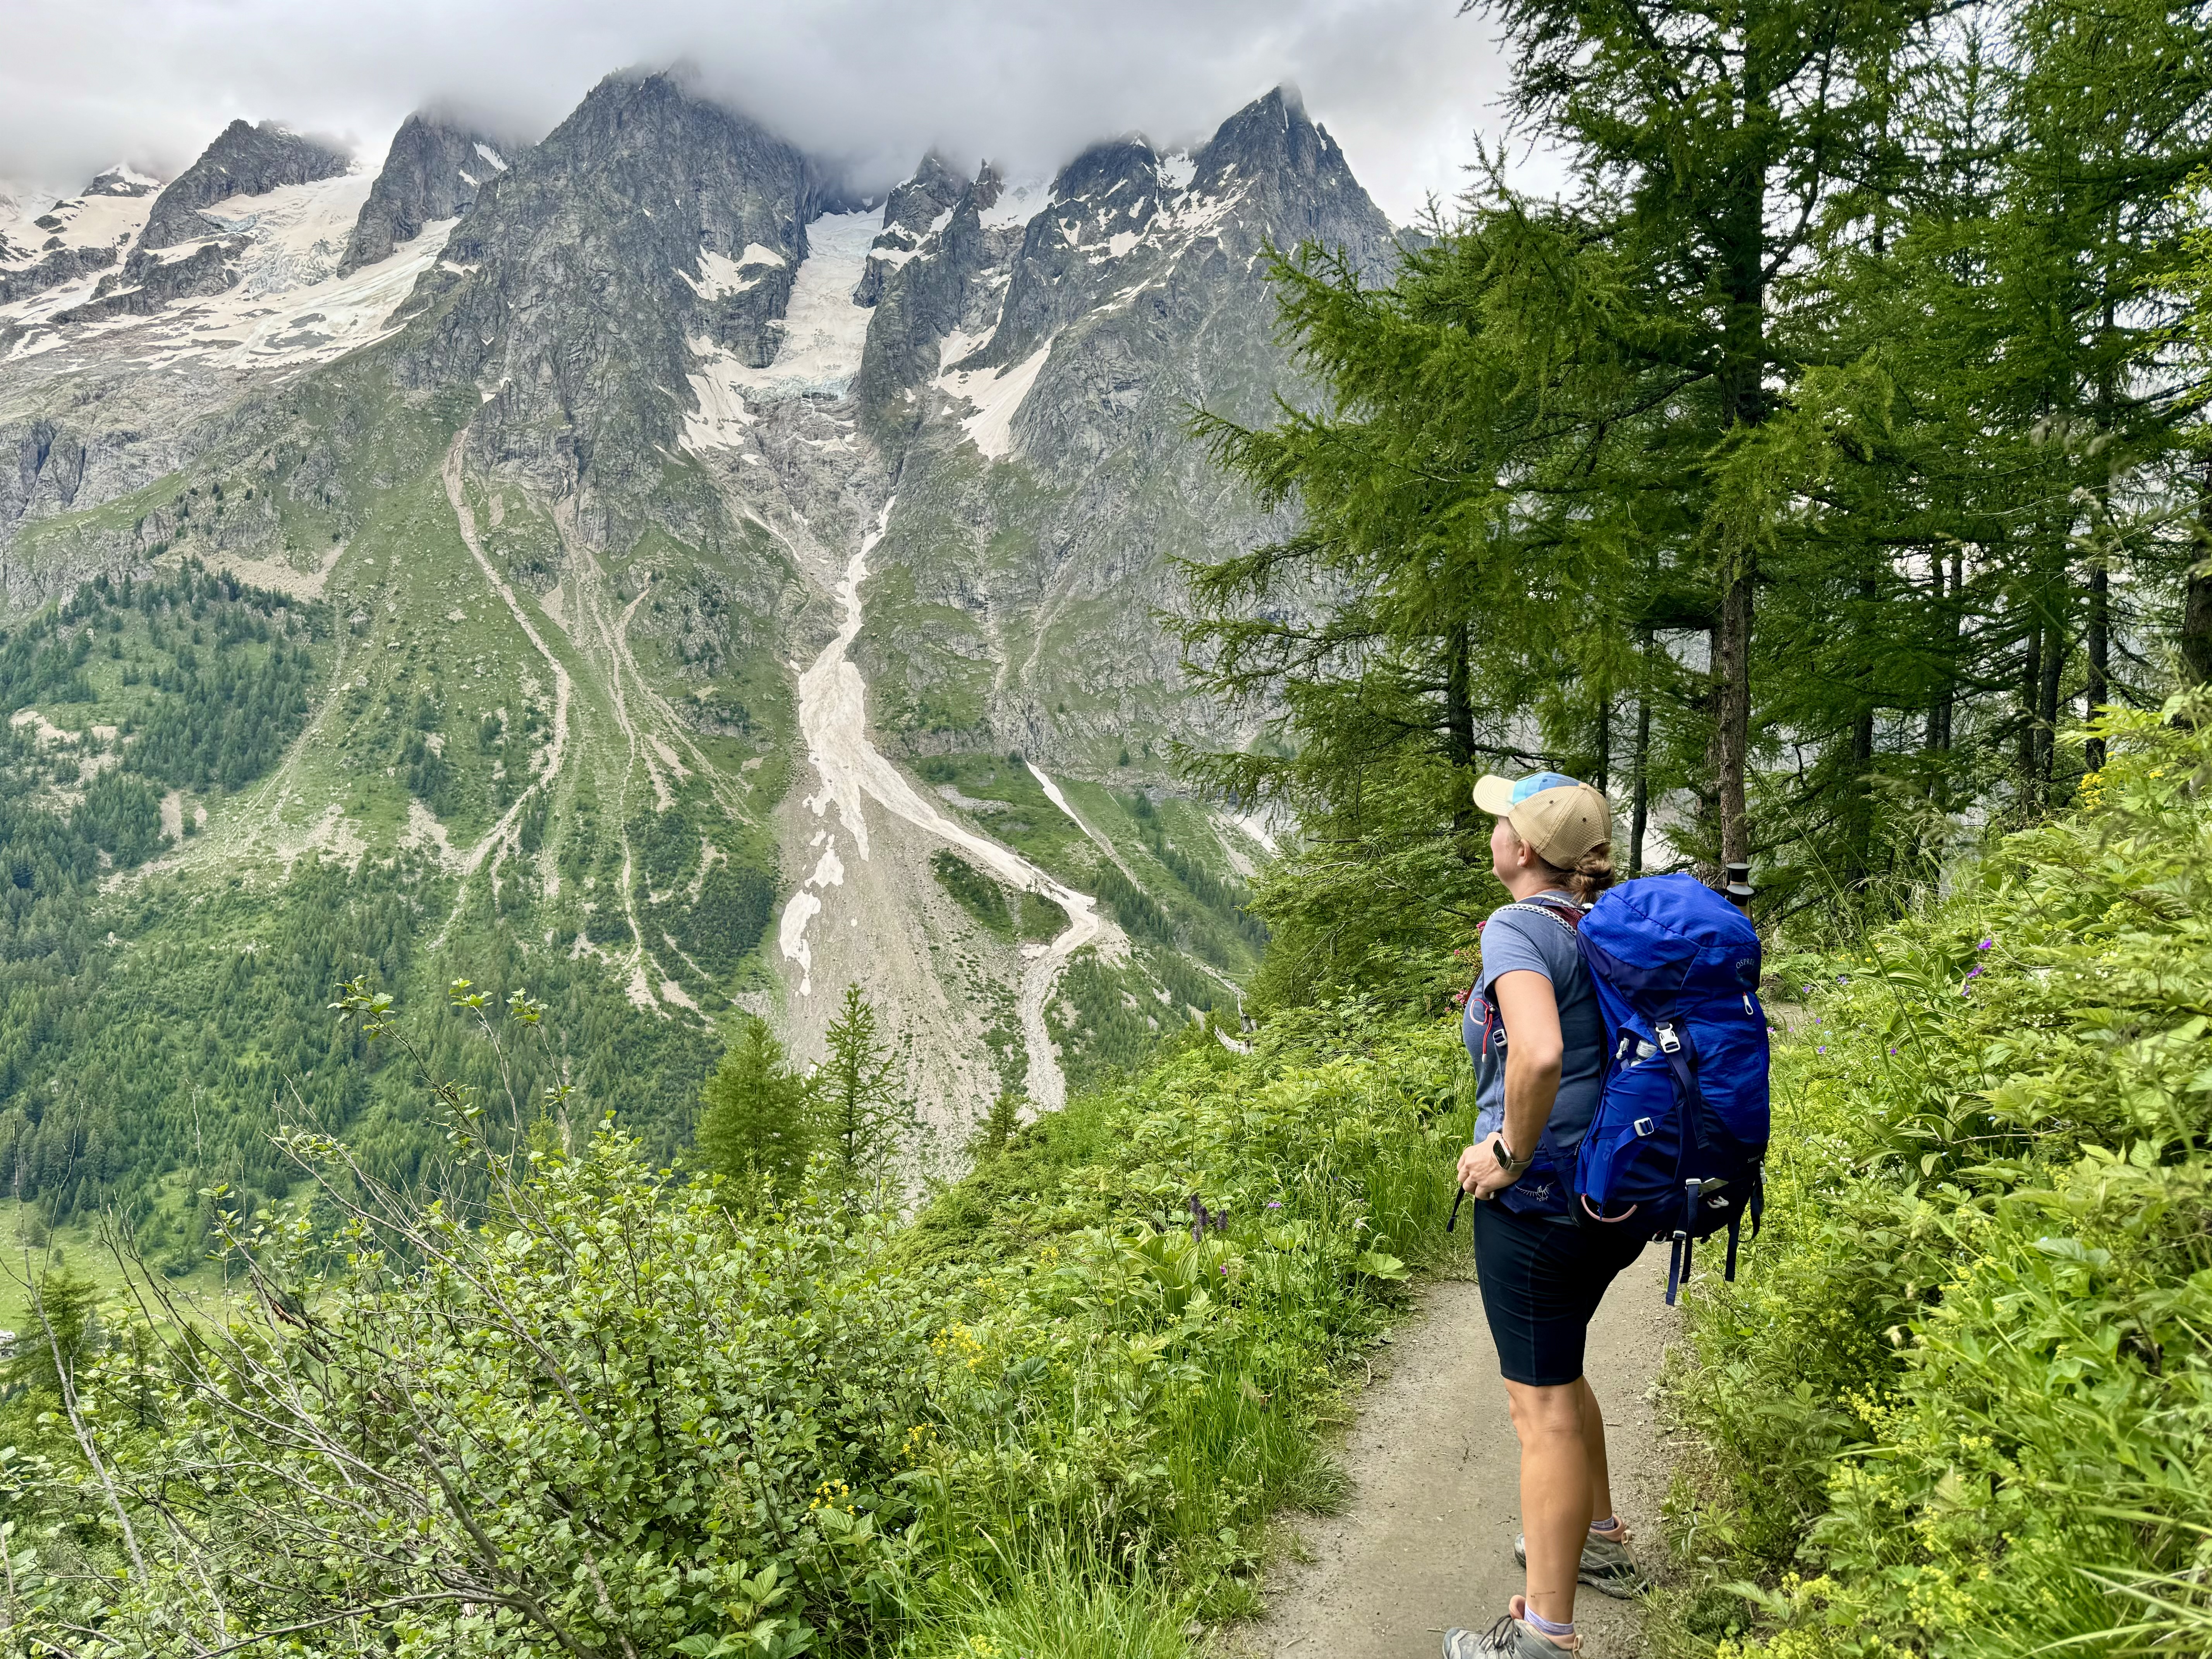
My Backpack: Osprey Sirrus 36
My backpack was the Osprey Sirrus 36L Women’s Pack.
Before the trip, I went to a hiking store and got professionally fitted. I tried on multiple packs before settling on this one. Once I bought it, I spent months training with it, loading it with weight and wearing it on local walks and some shorter hikes to make sure there were no hot spots.
That preparation paid off.
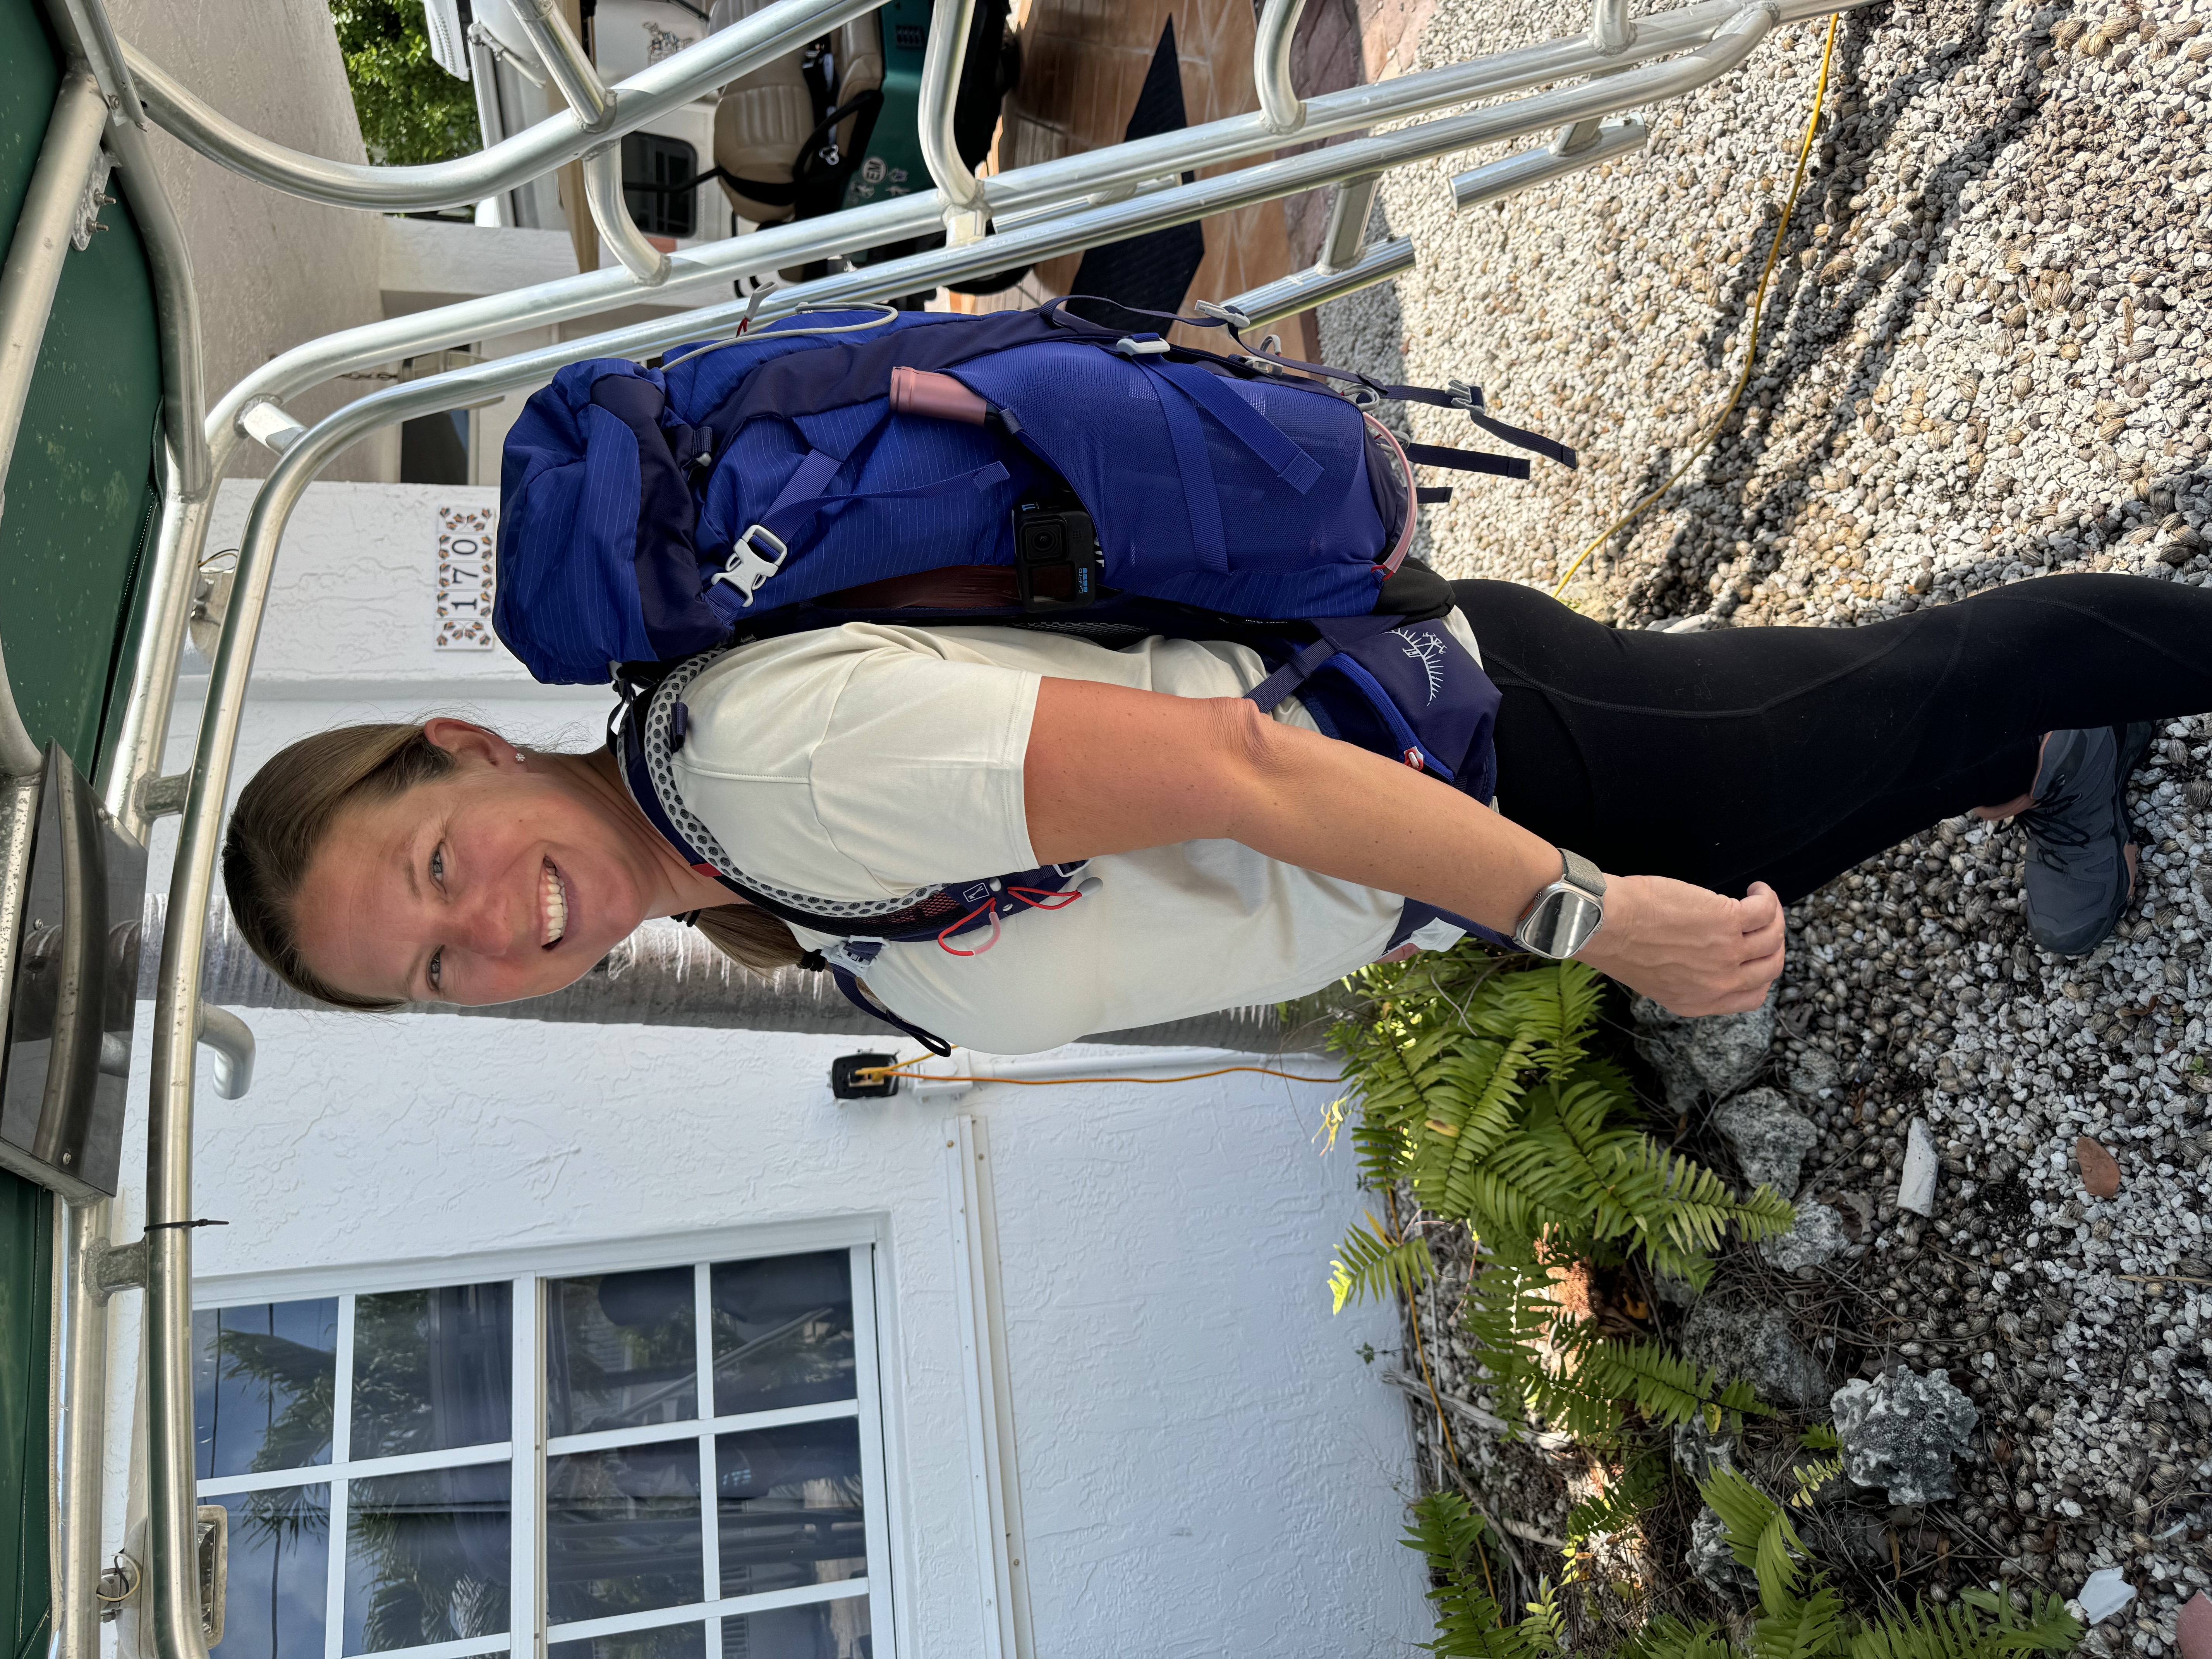
The pack was comfortable from day one and had more than enough room for everything I needed. In fact, I could have packed more, but I intentionally chose not to. Every extra pound matters when you’re climbing thousands of feet each day.
When I hike the Tour du Mont Blanc again with Tavis and Aiden in a few years, this is the pack I’ll carry.
The Best Decision I Made: Real Hiking Boots
One of the biggest debates online is whether to wear hiking boots or trail runners.
For me, the answer is easy.
I wore Salomon Adventure Recon Mid hiking boots and would choose them again without hesitation.
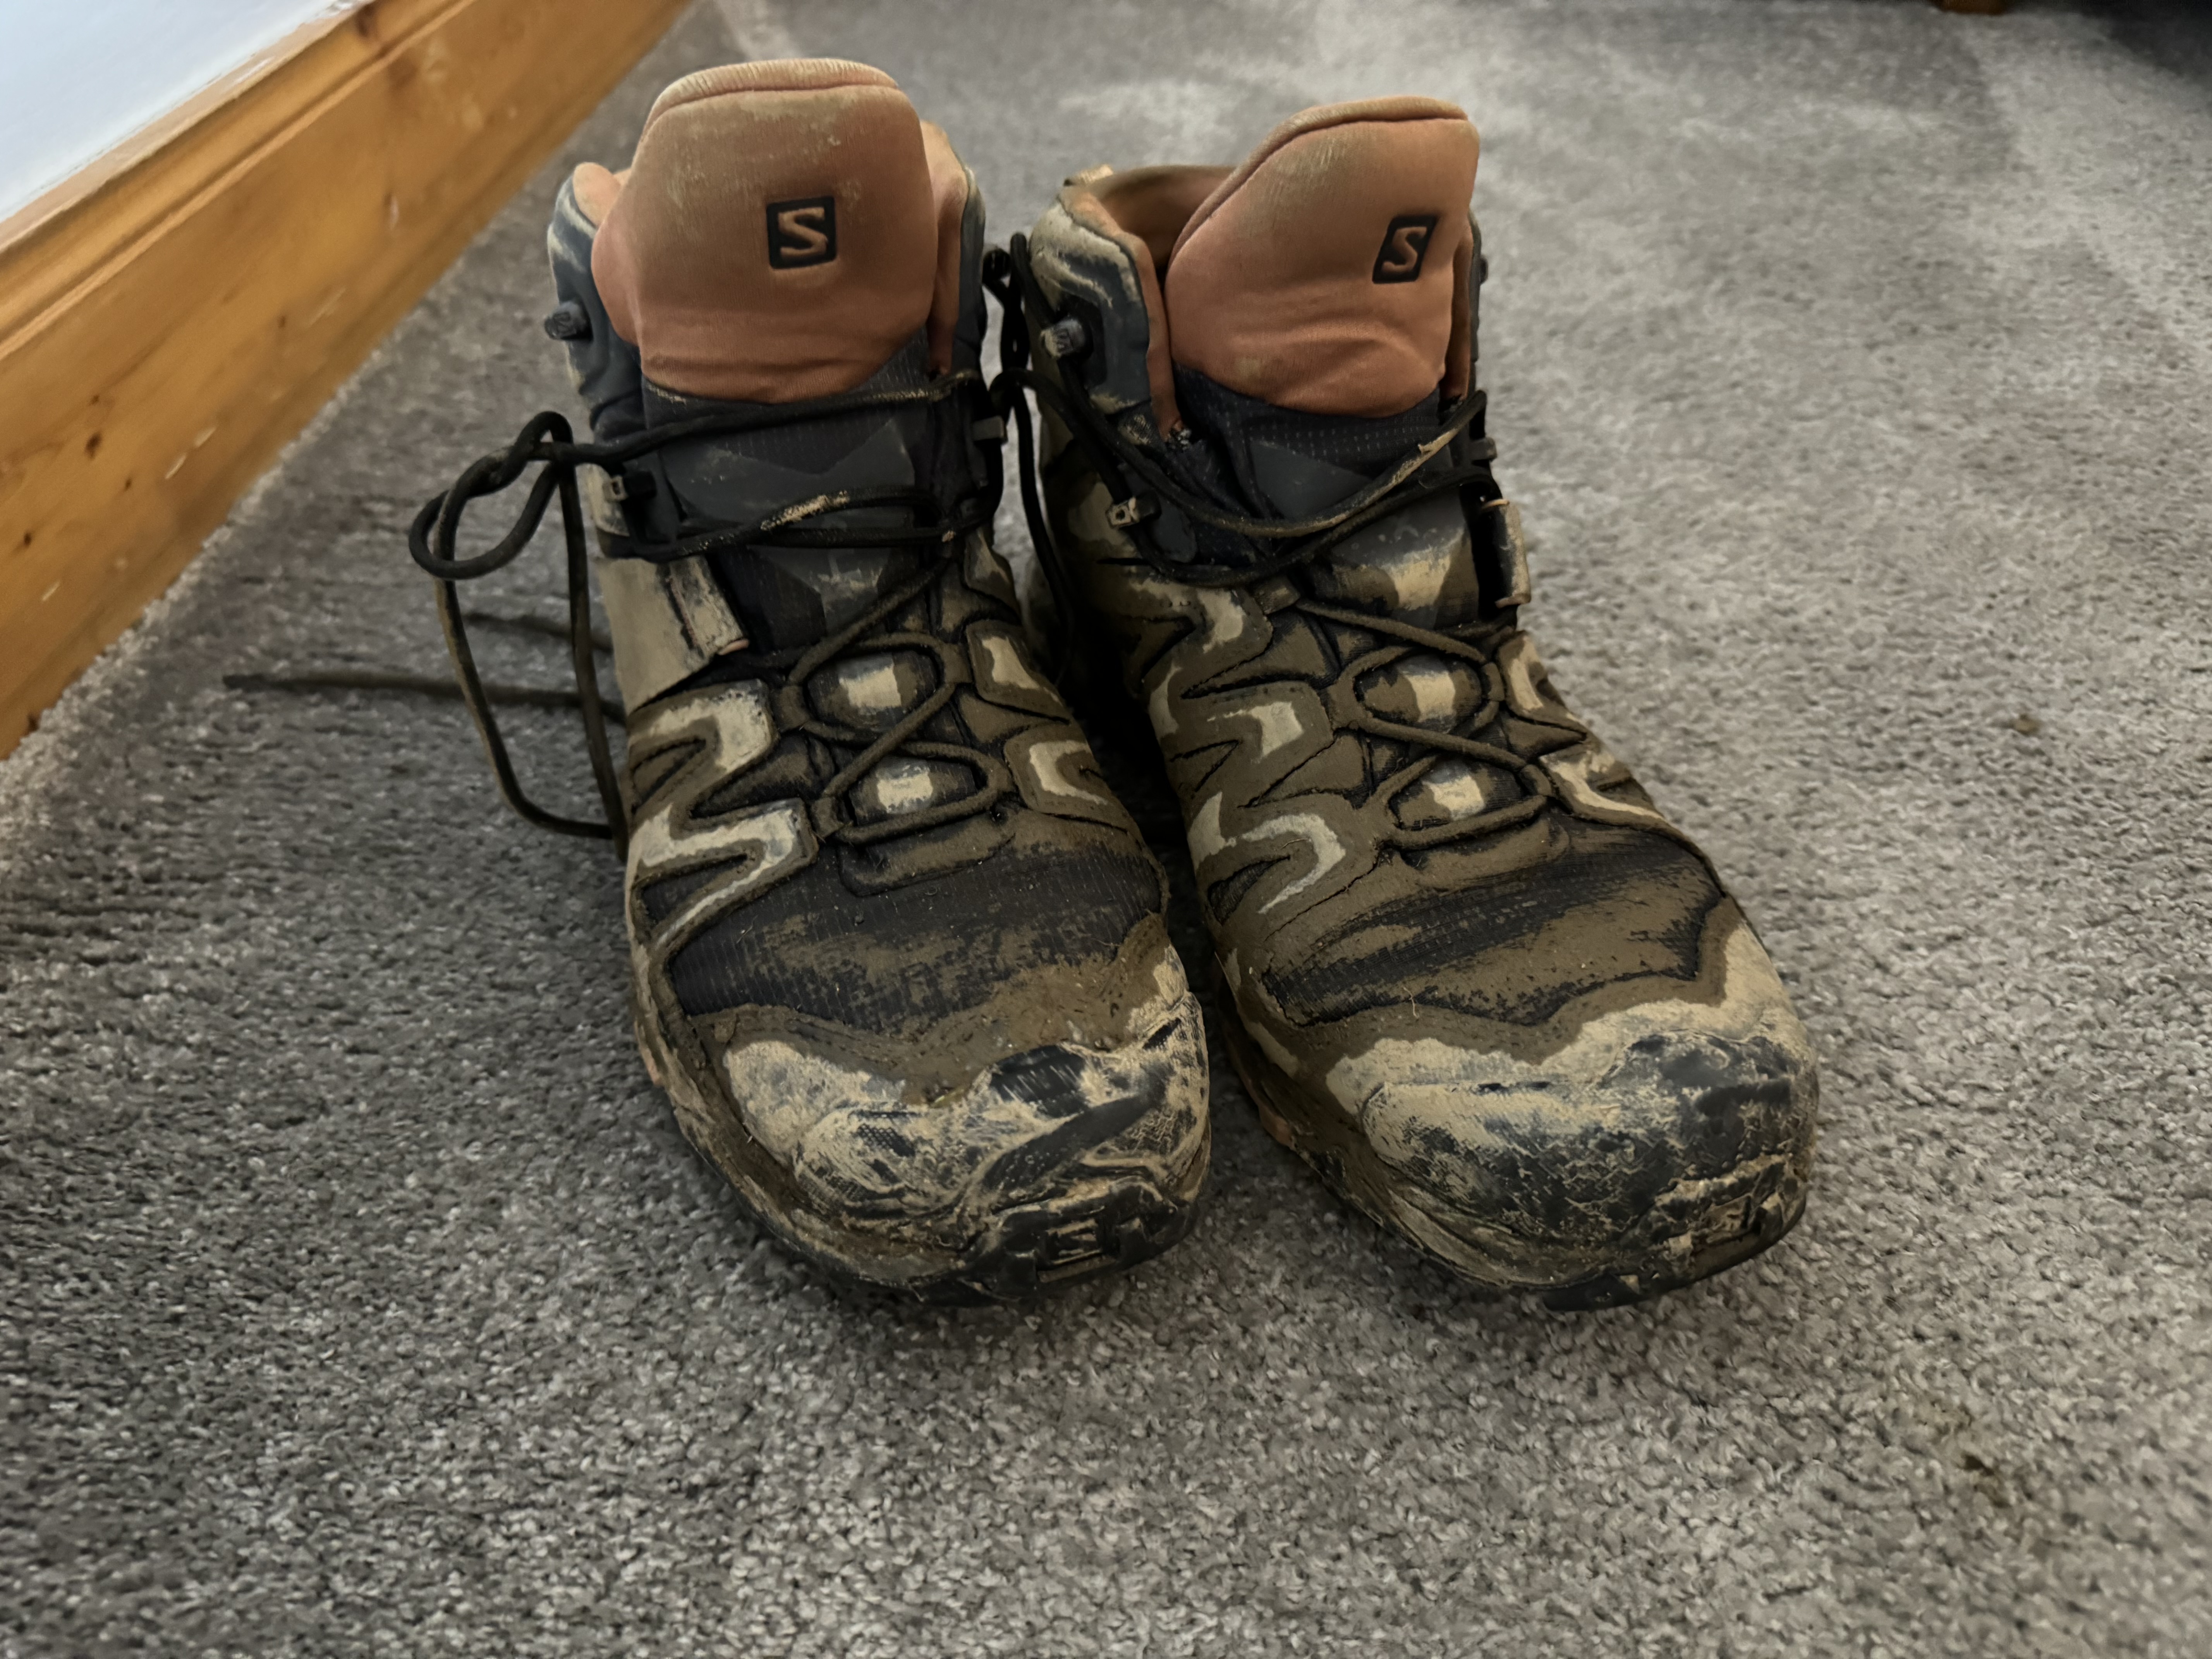
Like my backpack, I was fitted for them at a hiking store and spent about eight months breaking them in before leaving for Europe.
They were waterproof, comfortable, and provided excellent ankle support.
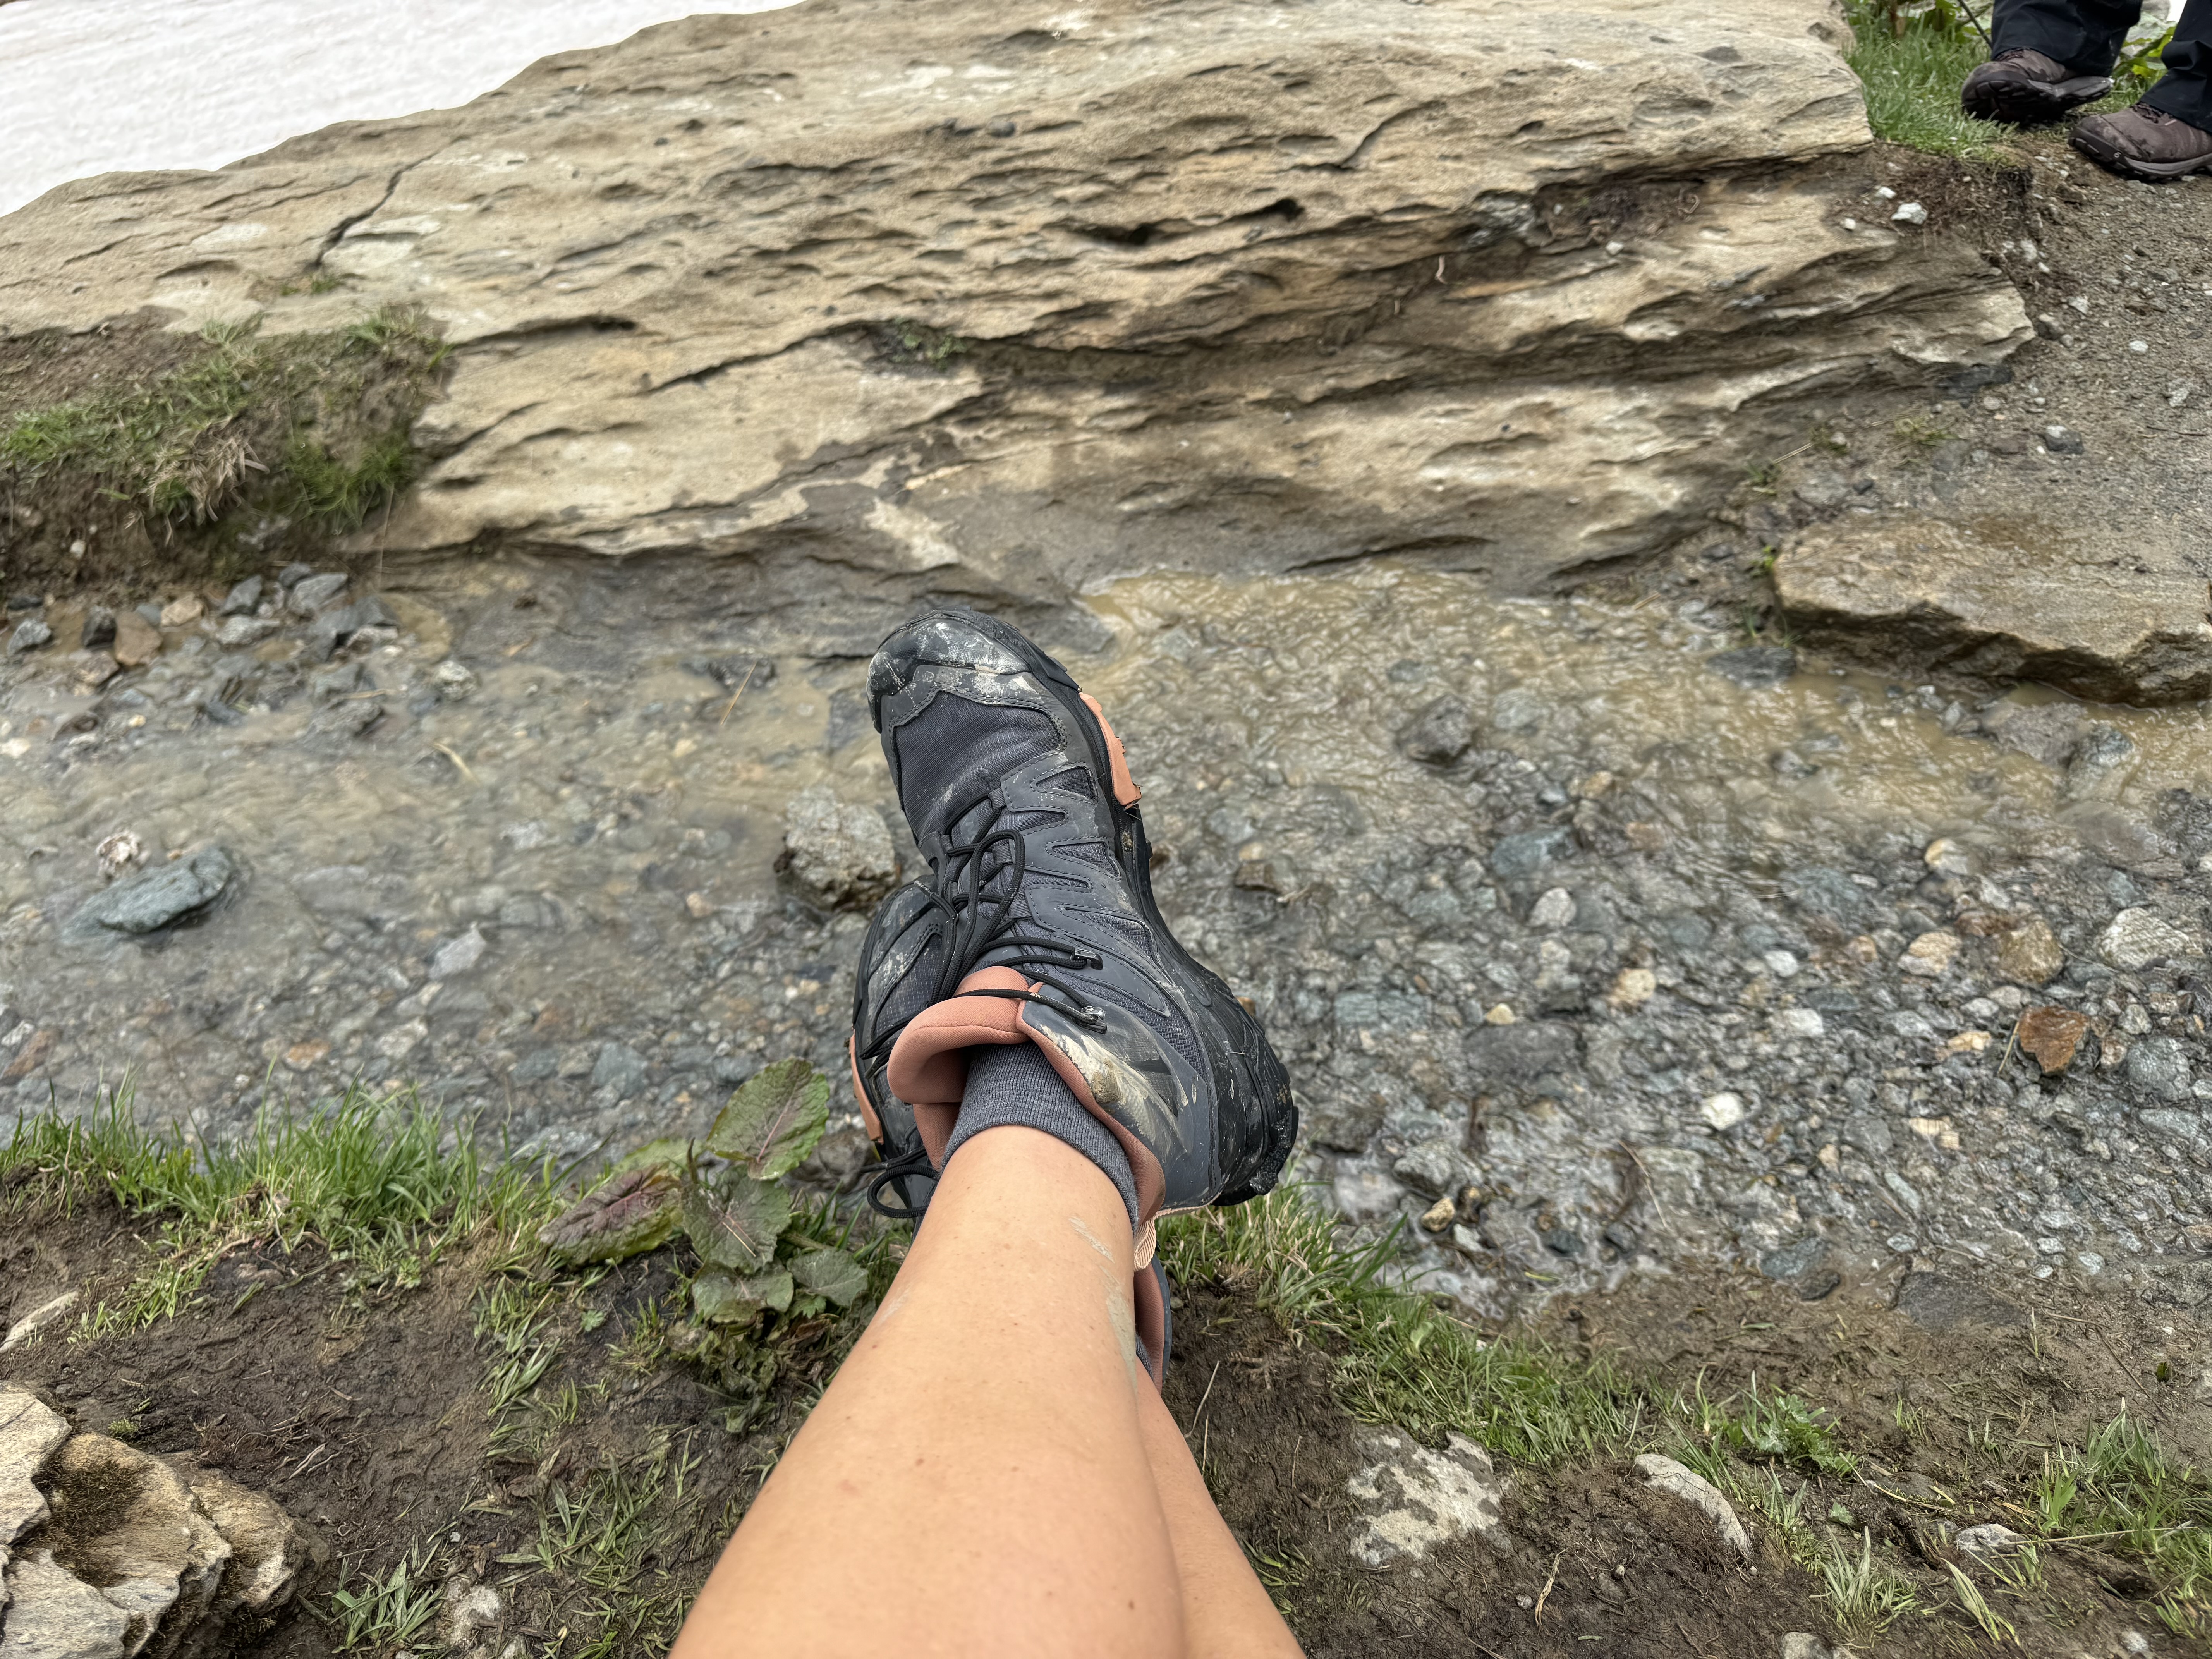
On the first day, I felt a blister starting during a long descent. My feet were sliding forward slightly in my boots. I immediately applied a Compeed blister patch and never had another issue.
Many hikers in our group wore lighter trail-running shoes. While that works for some people, I was grateful for the added support and waterproof protection of a mid-height boot, especially during rain, snow crossings, and rocky descents.
Trekking Poles: The $35 Item That Performed Like the Expensive Ones
I used TrailBuddy trekking poles from Amazon. They cost around $35.
Some hikers in our group carried expensive carbon-fiber poles that cost several times as much. Honestly, I never felt like mine were holding me back.
I used them every day.
Sometimes they stayed collapsed for the first part of the morning, but eventually they always came out.
They helped with long descents, knee fatigue, stream crossings and balance on uneven terrain.
I had never trained with trekking poles before the trip, but I was very glad I brought them.
The only people in our group who didn’t carry poles were two college track athletes from Georgetown and the Air Force Academy. They did just fine.
Unless you’re a 22-year-old track star, bring the poles.
Rain Gear Isn’t Optional on the TMB
The first day of our hike was a perfect example of why good rain gear matters.
We hiked to Lac Blanc in heavy rain and thick clouds. The visibility was so poor that we couldn’t even see the lake until we were standing right beside it.
I carried an REI Gore-Tex rain jacket and waterproof rain pants.
Both were on the required gear list from our guide company.
The rain pants had side zippers that allowed me to put them on without removing my boots, which turned out to be incredibly useful when weather moved in quickly.
I didn’t use them every day, but when I needed them, I really needed them.
The Patagonia Nano Puff Never Left My Side
If there was one clothing item that constantly earned its place in my pack, it was my Patagonia Nano Puff.
The guide company required it, and now I understand why.
I wore it… every morning, in the evenings, sometimes on lunch stops when my body would start to cool down and I was sweaty so I would get cold, crossing the high cols where the wind was ripping, any time the temperature dropped.
The weather can change quickly in the Alps.
One minute you’re hiking comfortably in a short-sleeve shirt. The next you’re standing on a windy pass surrounded by snow. Some of my picture are me in a t-shirt as I get to the top and there is snow all around me and two minutes later I am back in my Puff.
I felt like I took the Nano Puff on and off fifteen times a day.
It was worth every ounce.
My Simple Clothing Strategy
I intentionally packed very little clothing.
I carried two antimicrobial Patagonia hiking shirts and rotated them throughout the trip.
At the end of the day, I would wash one shirt in the sink, hang it to dry overnight, and wear the other the next day. Sink laundry was easier than I expected.
The same system worked for socks. I packed three pairs of Darn Tough socks and rotated them throughout the hike. I also packed specialty hiking socks with built-in liners. I never used them.
My favorite shorts ended up being a cheap pair of Skechers bike shorts I bought on Amazon.
I wore them every day.
The side pockets made it easy to grab my phone for photos without digging through my backpack. I packed more expensive hiking shorts too, but I always found myself reaching for the bike shorts instead.
One thing I think is worth mentioning is that you should test your clothing with your backpack, boots, and full hiking setup before your trip.
My favorite Lululemon running shorts are practically my uniform in the Florida Keys. I’ve walked miles in them, worked out in them, hiked in Costa Rica in them, and even swam in them before letting them dry while I kept hiking. I never gave them a second thought.
Then I started training with my backpack.
Something about the way the hip belt sat on my waist caused those shorts to ride up and chafe between my thighs. They went from being my favorite shorts to completely unusable for a long-distance hike.
Thankfully, I discovered that during training and not on Day 1 of the Tour du Mont Blanc.
The lesson? Don’t just test individual pieces of gear. Test your entire system together. Put on the backpack, wear the boots, load the pack with weight, and go walk a few miles. Sometimes the gear that works perfectly on its own doesn’t work nearly as well when everything comes together.
Water and Hydration
I carried a 2.5-liter CamelBak hydration bladder.
Most days that was all I needed.
Our guide always let us know when water refills would be available, and there were plenty of opportunities to refill along the route.
I also carried two empty Smartwater bottles.
When I knew a day would require extra water, I filled them. Otherwise, I kept them empty to save weight.
Most of my drinking came from the hydration bladder, I found it was easier to sip from the straw than to reach back and get the water bottle out of the side pocket on my backpack. When needed I would dump my refill bottle into the camelBak when we were taking a break.
Electronics I Would Bring Again
My iPhone 15 handled nearly everything. It was the latest iPhone at the time I hiked so obviously I would get the newest on they have before hiking again. I have been bunny the “pro” version since they offered it since it has the better camera. I would do the same thing again.
I kept it in airplane mode throughout most of the day and used it primarily for photos. At higher elevations, I would occasionally turn service back on and sometimes had enough signal to FaceTime Tavis and Aiden from the top of a mountain pass.
I also carried a Nitecore NB10000 power bank.
By mid-afternoon, I usually needed to recharge my phone. The Nitcore that I used was the lightest power brick at the time for a decent price point. For hiking, I would use those criteria when searching. Sometimes paying a little more is worth less weight or better gear, sometimes it is not.
For charging at hotels, I used a Mifaso travel adapter and had zero issues throughout the trip. It had several USB C plugs, a regular USB and some wall outlets to plug other things into.
What I’d Leave Home Next Time
Without question, my Nikon D810.
I love photography, but the camera was heavy.
Very heavy.
When I compare the photos today, the difference between the Nikon and my iPhone simply wasn’t worth carrying the extra weight up and down mountains all day.
My iPhone captured nearly everything I wanted. I have been trying to embrace mindset of, “don’t let the perfect, be the enemy of the good” and that was how I felt about the pictures. The ones from my phone were more than enough to capture the beauty and share the memories.
Next time, the Nikon stays home.
Gear I Packed But Never Needed
A few items never left my bag:
- Sleeping bag liner
- Microfiber towel
- Specialty liner socks
- Gels or electrolyte replacement.
The sleeping bag liner and towel were originally intended for mountain hut stays. Our itinerary ended up using hotels instead, so neither was necessary.
That said, I would still pack them if your itinerary includes huts.
Don’t Skip the Microspikes
Microspikes were on our required gear list.
We used them on three different days. This was not gear that I intended to use between my first hike and a hike again in a few years so similarly to the trekking pols, I opted for the $25 version on amazon. They worked perfectly and ended up gifting them to another hiker at the end of my trip to save space and weight in my luggage for the trip home.
How often you’ll need them depends on the snowpack and what time of year you’re hiking.
There were places where a slip would have meant a fun 30-foot slide down a snowfield.
There were also places where a slip could have had much more serious consequences.
The guides weren’t being overly cautious when they required them.
Bring the microspikes.
Small Items That Ended Up Being Incredibly Useful
Some of my most-used gear wasn’t expensive.
My small emergency kit included:
- Duct tape
- Zip ties
- Safety pins
- Sewing kit
- Paracord
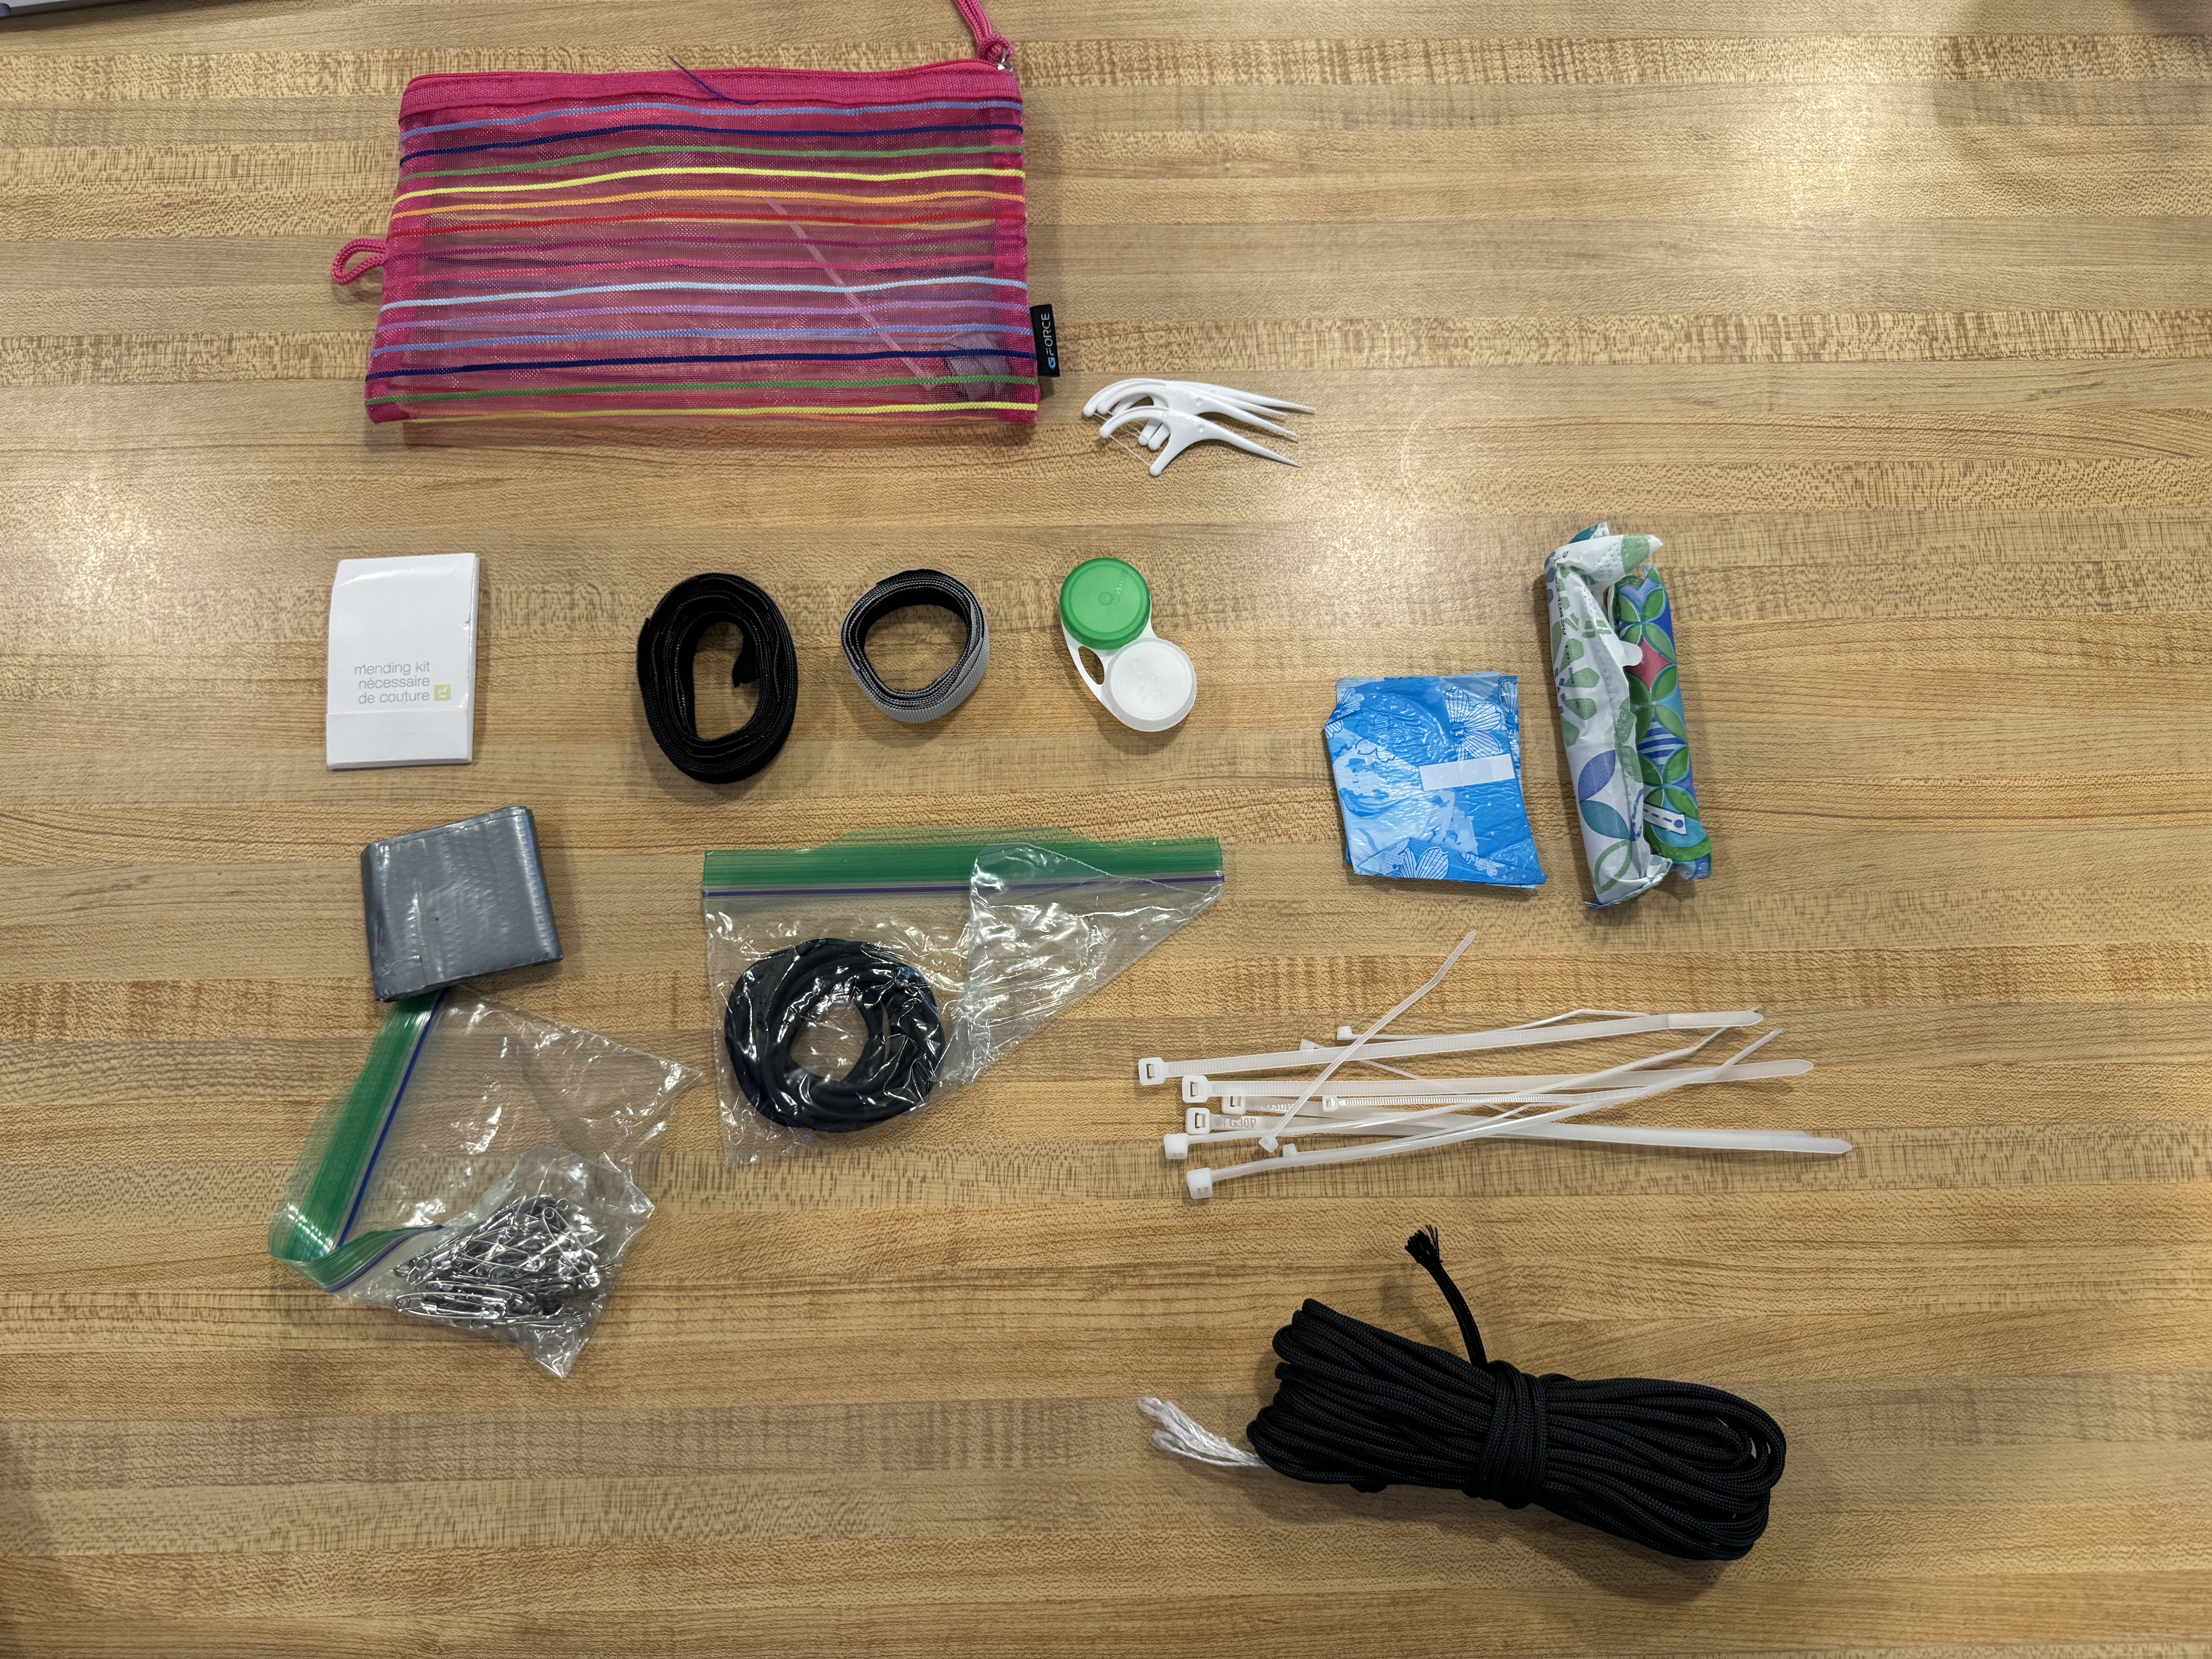
At some point during the trip, nearly everyone in our group borrowed something from it.
I also carried:
- SPF chapstick
- Small sunscreen
- Blister patches
- Bandages
- Antibiotic ointment
- Basic medications
None of those items take up much space, but they can save the day when you need them.
Five Things I Would Never Hike the Tour du Mont Blanc Without
If I had to narrow everything down to five items, these would be my non-negotiables:
- Properly fitted real hiking boots
- Trekking poles
- A comfortable backpack
- iPhone
- A Nano Puff jacket
Those five items earned their place every single day.
Final Thoughts
The Tour du Mont Blanc is one of the most incredible experiences I’ve ever had.
The good news is that you don’t need the most expensive gear on the market.
What matters most is choosing gear that fits properly, testing it before your trip, and learning what works for you.
Months before leaving for Europe, I trained with my backpack, broke in my boots, tested clothing systems in the Florida heat, and refined what I planned to carry.
That preparation mattered far more than buying the newest or most expensive gear.
And if you’re wondering whether the gear list is worth obsessing over, my answer is yes…but only up to a point.
After that, stop researching and start training.

If you want to read more about hiking Tour du Mont Blanc, you can check out my other posts on the breakfasts that we ate on the hike and some of the things that I learned.

Speak Your Mind